
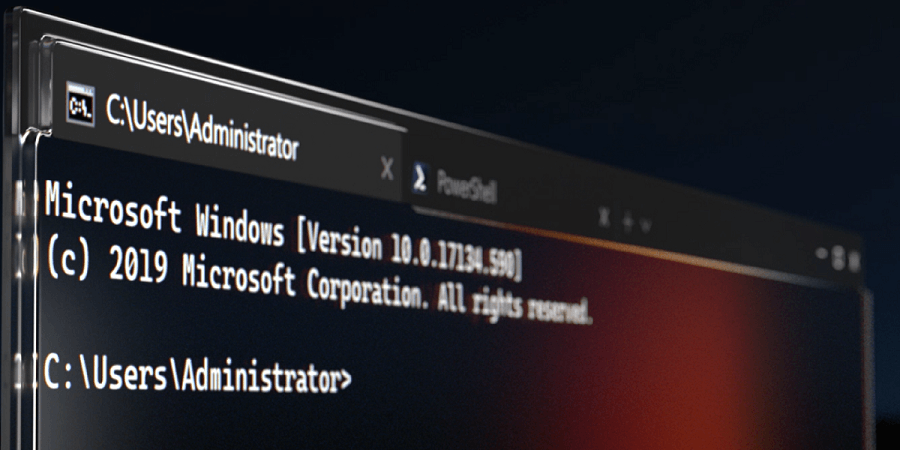
If like me, you’re more than a little bit tired of the old Windows Console then you’ll be excited to know that Microsoft finally has a replacement in the pipeline… and it’s not far away from official release!
It’s called the Windows Terminal and it is a quantum leap from the old Console host, both in terms of looks and functionality.
One of the great things about the new terminal is that it is highly customisable. In this article, I talk you through how to get the ‘Preview’ version installed on your machine and explore some of the customisation options.
Installation
Note that you’ll need to update Windows to Windows 10 version 18326.0 or higher in order to follow along.
First of all, we must locate the terminal app in the Microsoft Store. Use the ‘Search’ box within the Microsoft Store app to find Windows Terminal (Preview).
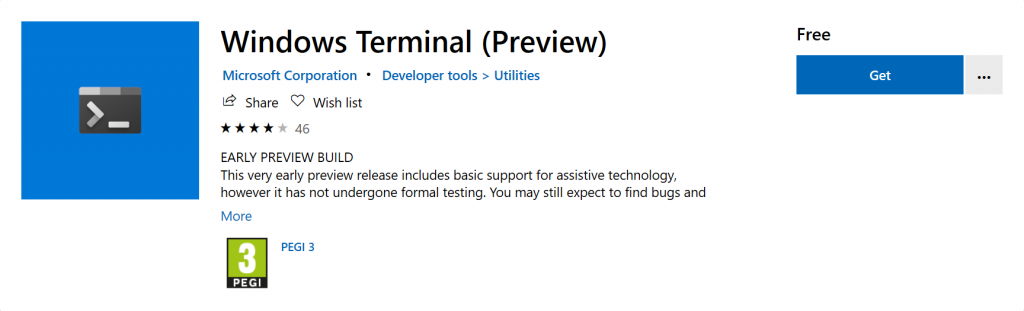
Press the ‘Get’ button to install the app.
Once the installation process has completed a ‘Launch’ button will appear; press this to open the newly installed terminal.
Note that following the installation you can launch the Windows Terminal at any time from the ‘Run’ dialog (WIN + R) by typing the following (very convenient) command and then pressing the Enter/Return key.
wt
Even shorter than cmd – nice!
Initial Impressions
By default, when the Windows Terminal launches for the first time, you will be presented with a PowerShell session.
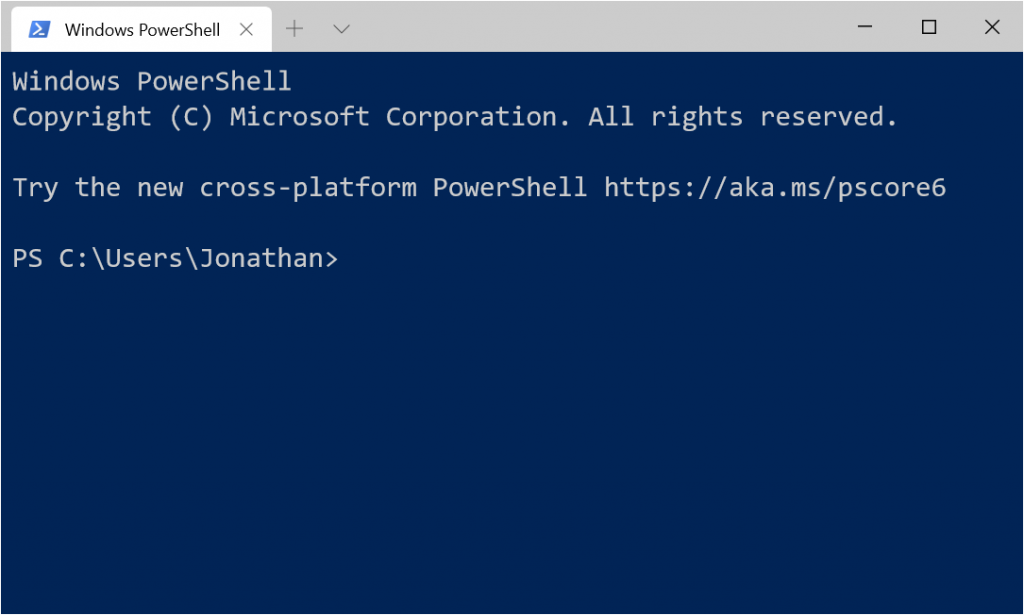
You’ll notice that the Windows Terminal looks a little more modern than its predecessor and your eyes will most likely be quickly drawn to the fact that the terminal now has tabs. Tabs are an awesome feature because they save you from having to constantly switch between terminal windows and you can run many different types of sessions simultaneously within a single terminal window.
Settings
Clicking the plus (+) icon beside the right-most tab will create a new PowerShell session and open it in a new tab. Alternatively, pressing the downwards-facing arrow beside the plus (+) icon will present you with a list of options similar to the screenshot below.
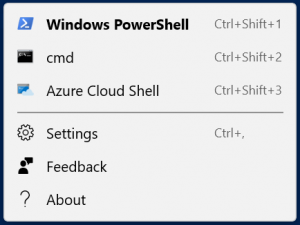
As you can see, the default options allow you to launch either a ‘Windows PowerShell’, ‘cmd’ or ‘Azure Cloud Shell’ session and you also have access to the terminal ‘Settings’ from this menu.
If you click on the Settings option this will open up the terminal settings file in your default JSON editor. For me, that’s Visual Studio and the contents of the file are as follows.
// To view the default settings, hold "alt" while clicking on the "Settings" button.
// For documentation on these settings, see: https://aka.ms/terminal-documentation

{
    "$schema": "https://aka.ms/terminal-profiles-schema",

    "defaultProfile": "{61c54bbd-c2c6-5271-96e7-009a87ff44bf}",

    "profiles":
    [
        {
            // Make changes here to the powershell.exe profile
            "guid": "{61c54bbd-c2c6-5271-96e7-009a87ff44bf}",
            "name": "Windows PowerShell",
            "commandline": "powershell.exe",
            "hidden": false
        },
        {
            // Make changes here to the cmd.exe profile
            "guid": "{0caa0dad-35be-5f56-a8ff-afceeeaa6101}",
            "name": "cmd",
            "commandline": "cmd.exe",
            "hidden": false
        },
        {
            "guid": "{b453ae62-4e3d-5e58-b989-0a998ec441b8}",
            "hidden": false,
            "name": "Azure Cloud Shell",
            "source": "Windows.Terminal.Azure"
        }
    ],

    // Add custom color schemes to this array
    "schemes": [],

    // Add any keybinding overrides to this array.
    // To unbind a default keybinding, set the command to "unbound"
    "keybindings": []
}
The Settings file provides a great deal of flexibility for customising the terminal according to your own unique preferences. You can add as many ‘profiles’ as you wish and you can hide one or more of the default profiles if desired.
To update the default profile which is used whenever you create a new tab, simply set the value of the defaultProfile property to the value of the guid property of your desired profile.
Adding a new Profile (PowerShell Core)
When the Windows Terminal first launched you may have noticed the following message.
Try the new cross-platform PowerShell https://aka.ms/pscore6
The link within the message will take you to a webpage where you can access instructions for installing PowerShell Core onto various operating systems.
PowerShell Core is a new version of PowerShell which is cross-platform and runs on the Windows, macOS, and Linux operating systems.
On the webpage you accessed above, click on the Installing PowerShell Core on Windows link.
At the top of the page, there is a statement indicating that you can run the command below if you already have the .NET Core SDK installed (this will most likely be the case if you’re a .NET developer and you have Visual Studio installed on your machine, alternatively, you can follow the above link to install the SDK or use one of the other available PowerShell Core installation options.)
dotnet tool install --global PowerShell
Once the PowerShell Core installation completes you should see the following message displayed within the terminal.
You can invoke the tool using the following command: pwsh
Tool 'powershell' (version '6.2.3') was successfully installed.
Note that you must close and relaunch the Windows Terminal before you can start using PowerShell Core.
Profile Customisation
Next, let’s customise our PowerShell Core profile.
Remember the Settings file from earlier?
Open it up again and add the following profile to the profiles section of the file.
{
    "guid": "{e03ce3d8-275a-4958-adce-5ffa5d5a78a3}",
    "name": "PowerShell Core",
    "commandline": "pwsh.exe",
    "acrylicOpacity": 0.5,
    "background": "#012456",
    "backgroundImage": "%userprofile%/Pictures/wall-e.jpg",
    "backgroundImageOpacity" : 0.5,
    "closeOnExit": false,
    "colorscheme": "Campbell",
    "cursorColor": "#ffffff",
    "cursorShape": "bar",
    "fontFace": "Consolas",
    "fontSize": 16,
    "historySize": 5000,
    "icon": "ms-appx:///ProfileIcons/{574e775e-4f2a-5b96-ac1e-a2962a402336}.png",
    "padding": "5, 5, 5, 5",
    "snapOnInput": true,
    "startingDirectory": "%userprofile%/Desktop",
    "useAcrylic": true
}
You’ll need to change some of the settings such as backgroundImage to suit your environment and I recommend that you conduct a few experiments by adjusting some of the other settings to see what effect they have. For example, you can adjust the backgroundImageOpacity setting to control the transparency level of your chosen background image, or change the padding setting to control the distance between the text within the session and the edge of the terminal window.
The guid setting can be different from my example, as long as it is unique within your Settings file.
Note that some of the settings above are superfluous, but I have included them anyway to give you an idea of what is possible; there are many more settings that you can add and configure for your profile if required.
When you save the Settings file your terminal window will immediately be updated to reflect the changes made to the configuration. I’ve included a screenshot below which demonstrates what the terminal with the customised profile looks like on my machine.
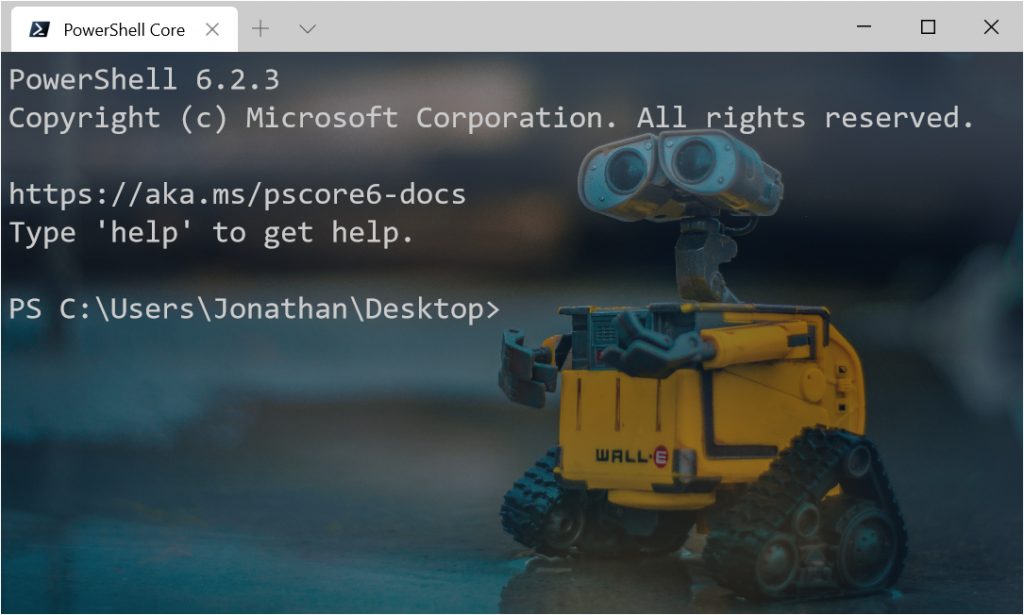
Pretty cool, don’t you think?
There are many more ways to customise the Windows Terminal and there are lots of other neat things that are possible with it that you should check out, such as the ability to interact with Linux using the Windows Subsystem for Linux.
Now, go have some fun experimenting further with the new Windows Terminal! 🙂
Comments