Have you ever installed an instance of SQL Server onto a new workstation or server and subsequently realised that you forgot to rename the machine first?
In these cases, you’ll likely have installed both SQL Server and SSMS (SQL Server Management Studio). After launching SSMS you happen to notice that the ‘Server name’ field is defaulting to something like ‘WIN-9RDGWG0T343’.
Oops! You wanted this to be something else like ‘SERVER-01’.
After realising your mistake, you proceed to rename the machine to what it should be. However, after relaunching SSMS you notice that the server name is still ‘WIN-9RDGWG0T343’ and does not match your new machine name. How frustrating!
Thankfully this issue is straightforward to fix and I will show you how to resolve it in this article.
Problems
When the server name that is registered by SQL Server at the time of installation does not match the name of the machine that the SQL Server instance is currently hosted on, this can cause various problems.
Aside from the annoyance of the name not matching, a server name mismatch will prevent you from doing other things, such as setting up and managing SQL Server Replication publications and subscriptions.
Therefore, it’s important to correct the server name that is stored in the SQL Server metadata as soon as possible after noticing the issue and before setting up things like Replication, Reporting Services, or Database Mirroring.
You’ll save yourself a lot of trouble further down the line.
Resolution
Let’s walk through how to resolve the problem in the following sub-sections.
I’m going to assume that you have already renamed the computer that you previously installed SQL Server onto. If you haven’t yet, go ahead and do that within your Windows computer properties before proceeding further.
Confirm the current server name
The first thing you should do is confirm the current server name that SQL Server has stored in its metadata.
You can do this by executing the following stored procedure within SSMS.
sp_helpserver
This will display a list of all currently installed SQL Server instances on the server.
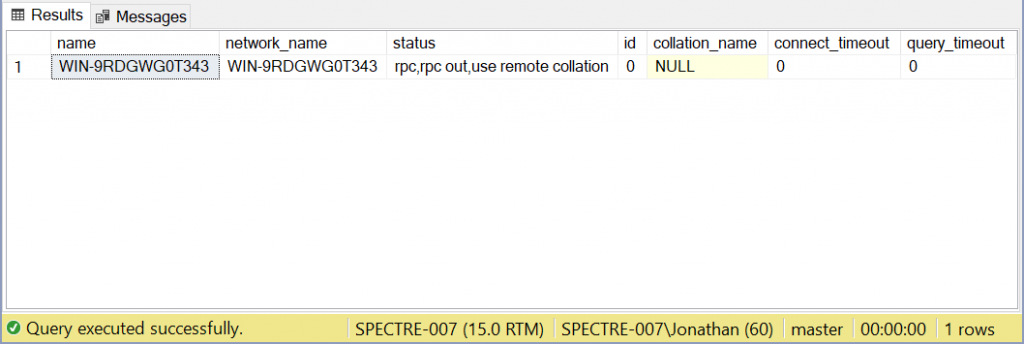
In most cases, there will only be one record returned and your Results pane will look similar to the screenshot below.

As you can see from the above screenshot, the SQL Server name stored in the metadata is as follows.
WIN-9RDGWG0T343
If you have installed a named instance the SQL Server name will be more like the following.
WIN-9RDGWG0T343\SQLEXPRESS
Now that we have confirmed the incorrect server name, we need to drop it and add the new server name.
Drop the server name
The next thing you need to do is drop the old server record as follows.
sp_dropserver 'WIN-9RDGWG0T343'
If you have a named instance, make sure to include the instance name along with the server name, as follows.
sp_dropserver 'WIN-9RDGWG0T343\SQLEXPRESS'
In either case, make sure that the string inside the single quotes matches the name of the server returned by the sp_helpserver stored procedure exactly.
If you have executed the stored procedure correctly you should receive output that is similar to the following.
Commands completed successfully.

Completion time: 2022-06-30T21:28:38.7245671+01:00
The next step is to add a new server record with a name that matches what you have renamed the machine to.
Add the new server name
At this stage, you need to add a new server record, as follows.
sp_addserver 'SERVER-01', local
Notice the addition of the ‘, local’ text. This is important and the stored procedure execution will fail if this is not included. The local parameter indicates that it is a local server we are adding, as opposed to a remote/linked server.
As per the sp_dropserver stored procedure, the output should indicate that the commands were completed successfully.
Check the new server name
After adding the new server name, you should execute the sp_helpserver stored procedure again to verify that the server name has been corrected, as follows.
sp_helpserver
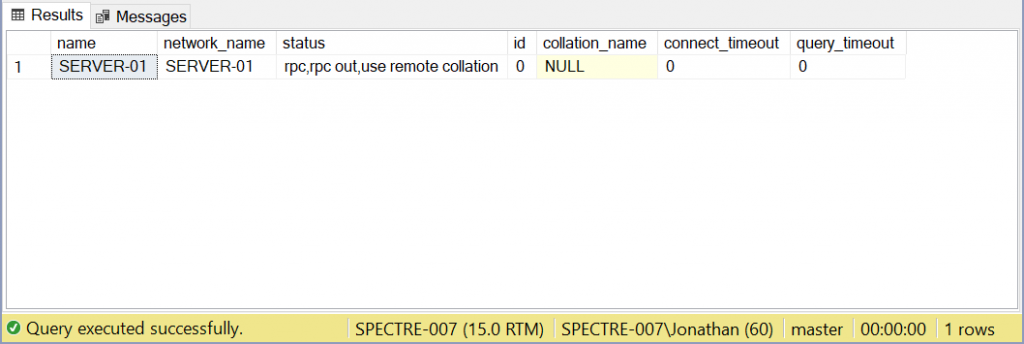
The results should now be similar to the screenshot below.

At this stage, I recommend closing SSMS and restarting your SQL Server instance.
After the SQL Server service has been restarted, relaunch SSMS and the ‘Server name’ field should default to the new server name you have added.
Now try logging in to verify that the new configuration has been applied successfully.
Summary
In this article, I have documented how to resolve a common issue that can occur when installing SQL Server onto a development, testing, or indeed a production server machine. If you rename a machine that SQL Server has already been installed onto, it is vitally important that you update the SQL Server metadata.
I started by highlighting some of the problems that can occur due to a server name mismatch. I then covered the built-in stored procedures that you need to execute to check the current server setup and then remove and register the correct server name within SQL Server.
The steps outlined in this article apply in any situation where a machine that hosts a SQL Server instance has been renamed, whether this is for a new or existing installation.


Comments