

Many apps today need to store data locally on the device they are running on in order to allow the user to continue to perform useful functions while offline or when network connectivity is unreliable.
SQLite is an ideal solution for both simple and complex local data storage requirements. Whether you are storing small sets of data such as user preferences, or large volumes of relational data, SQLite can work for you.
In this article, I am going to cover how to simplify your local data storage using the SQLite-net library.
Choosing the right storage solution
When choosing a solution for storing data locally on a device there are a number of considerations that you’ll need to make.
For a start, your options are usually somewhat constrained by the type of application you are developing and what operating systems you intend to support, amongst other things.
For an enterprise .NET desktop app, a replicated SQL Server instance may be best. For a web app that has simple data requirements, Session Storage or Local Storage may be the most sensible choice.
If your application is running natively on a mobile device as a Xamarin app you have a number of options such as the Preferences API or your own local data files. However, I believe that SQLite is one of the best choices that you can make.
SQLite is a full relational database and is appropriate for storing large amounts of data.
It works really nicely for local data storage as it is lightweight, platform-independent, and no server process is needed. SQLite works directly with local database files and doesn’t require a centralised server.
I think that the official SQLite website sums it up very well in the following words.
Small. Fast. Reliable.
Choose any three.
Given the aforementioned advantages, SQLite can be a great local data storage solution for a wide variety of scenarios.
Choosing the right library
Once you’re settled that SQLite is the most appropriate local data storage choice for your project, the next thing to consider is the library that you will use to interact with the SQLite database.
There are many SQLite libraries available for all of the most popular programming languages, including Python, Java, JavaScript, and C#. In short, regardless of your chosen language or development environment, you’ll find that there are SQLite libraries available to you.
In this section, I am focusing on the available methods for interacting with SQLite using .NET specifically.
System.Data.SQLite
System.Data.SQLite is one of the oldest, most mature .NET SQLite libraries.
It was originally created by Robert Simpson back in 2005. However, since 2010, the SQLite team have taken over the development and maintenance of the project and it is still actively maintained.
New versions of System.Data.SQLite are usually released within 2-3 weeks of the core SQLite library, so it’s comforting to know that you’re using a library that is always up to date.
In my experience, I have found the System.Data.SQLite library to be a very robust, fast library and it feels very familiar if you’ve ever used the System.Data.SqlClient library for interacting with SQL Server.
Microsoft.Data.SQLite
Microsoft.Data.SQLite is a more recent SQLite library developed by Microsoft.
It was created by the Entity Framework team and the initial version was released in 2016. The library is regularly updated by Microsoft with version 6 of the library being worked on at the time of writing.
Microsoft.Data.SQLite was designed to be a lightweight implementation that aligns with the goals of .NET Core and the reunification of .NET into a modern, cross-platform set of libraries. However, it is important to note that System.Data.SQLite has since been ported over to work with .NET Core/Standard. Despite this, the original goal of Microsoft.Data.SQLite remains, which is to offer a lightweight, modern implementation.
Microsoft.Data.SQLite is a nicely designed library in my estimation. However, I have previously found that System.Data.SQLite offers better performance compared to Microsoft.Data.SQLite (despite Microsoft.Data.SQLite supposedly being more lightweight) which dissuaded me from considering it at the time.
Note that the performance situation may have changed so it may still be worth checking out Microsoft.Data.SQLite as improvements have been made in more recent versions.
SQLite-net
SQLite-net is a modern, cross-platform SQLite library developed by Frank A. Krueger.
The original PCL version of SQLite-net was first released in 2015 and is regularly updated, both by the original author and by a sizable number of community contributions.
SQLite-net is a minimalistic library that provides basic ORM (Object-Relation Mapping) features for .NET and Mono application developers.
The library is recommended by the Xamarin team for accessing SQLite databases on mobile devices.
I think that the following bullet points which are taken from the SQLite-net GitHub ReadMe sum up the key benefits of the library very well.
Very easy to integrate with existing projects and runs on all the .NET platforms.
Thin wrapper over SQLite that is fast and efficient. (This library should not be the performance bottleneck of your queries.)
Very simple methods for executing CRUD operations and queries safely (using parameters) and for retrieving the results of those query in a strongly typed fashion.
Works with your data model without forcing you to change your classes. (Contains a small reflection-driven ORM layer.)
Having used the library myself I can vouch for how nice it is to use and I have found it to be highly performant.
It also has a number of really cool features that I will cover in the following sections.
Using SQLite-net
To get started you’ll need to install the SQLite-net-pcl NuGet package into your project.
Don’t let the fact that the NuGet package has ‘PCL’ in the name cause any confusion. The library is platform-independent and works across a variety of project types, including .NET Core/Standard libraries.
Note that you will need to install the NuGet package into both the library containing your data layer logic, as well as the host project that calls into said library.
Making a connection
After installing SQLite-net into your project/projects you can start off by setting up a connection to a SQLite database file.
Below is an example of how to do this.
string baseDataDirectory = Path.Combine(
    Environment.GetFolderPath(Environment.SpecialFolder.CommonApplicationData),
    "JC", "LocalDataStorage", "Data");

string databaseName = "TodosAppDb";

var database = new SQLiteConnection(Path.Combine(baseDataDirectory, databaseName));
The SQLiteConnection constructor takes the path to the database file as an argument.
The database file itself doesn’t necessarily need to exist at this point, however, the directory containing the database does need to be present on the file system. If the database file doesn’t currently exist, it will be created automatically after the SQLiteConnection constructor has executed.
Note that alternatively, you can create a SQLiteAsyncConnection object which exposes an asynchronous API. The asynchronous methods use the Task Parallel Library (TPL) underneath and can improve performance when you need to scale things up.
Creating tables
If you don’t already have an existing SQLite database to work with, you can use SQLite-net to create the tables needed to store your local data.
One of the really cool things about SQLite-net is its ability to migrate your database schema for you.
All of this happens automatically without you having to think about the individual migrations.
As part of its ORM capabilities, SQLite-net is able to bind app models to database tables. Below is an example of a C# model class that can be mapped to a SQLite database table by SQLite-net.
/// <summary>
/// Represents a local 'Todo' item.
/// </summary>
[Table("Todos")]
public class LocalTodo
{
    #region Properties

    /// <summary>
    /// The unique ID of the Todo item.
    /// </summary>
    [PrimaryKey, AutoIncrement]
    public int Id { get; set; }

    /// <summary>
    /// The ID of the User the Todo item is assigned to.
    /// </summary>
    public int UserId { get; set; }

    /// <summary>
    /// The Title/Description of the Todo item.
    /// </summary>
    public string Title { get; set; }

    /// <summary>
    /// Whether or not the Todo item has been completed.
    /// </summary>
    public bool Completed { get; set; }

    #endregion

    #region Methods

    /// <summary>
    /// Overrides the standard 'ToString' method with the Title of the Todo.
    /// </summary>
    /// <returns>The Title of the Todo with a prefix</returns>
    public override string ToString() => $"Title: {Title}";

    #endregion
}
The above class is just a plain old C# class with some attributes that are specific to SQLite-net.
Note that all of the get/set properties will be automatically mapped. You can use the Ignore attribute if you want to exclude a specific property from being mapped as a column.
The Table attribute is used to specify a custom name for the database table.
The PrimaryKey and AutoIncrement attributes configure the Id column to be the primary key for the table and automatically increment the value of the column whenever a new row is inserted into the table.
Given the above LocalTodo class, the following line of code will automatically create a ‘Todos’ table in the SQLite database if it doesn’t already exist.
database.CreateTable<LocalTodo>();
The creation of database tables can be centralised into a method, as follows.
/// <summary>
/// Static method to allow local data services to initialise their associated database conveniently.
/// </summary>
/// <param name="database">The SQLite database connection</param>
/// <param name="databaseName">The SQLite database name</param>
/// <param name="tables">The SQLite database tables to create (if required)</param>
/// <returns>An initialised SQLite database connection</returns>
public static SQLiteConnection InitializeLocalDatabase(SQLiteConnection database, string databaseName, params Type[] tables)
{
    if (database == null)
    {
        if (!Directory.Exists(BaseDataDirectory)) Directory.CreateDirectory(BaseDataDirectory);

        database = new SQLiteConnection(Path.Combine(BaseDataDirectory, databaseName));
    }

    database.CreateTables(CreateFlags.None, tables);

    return database;
}
Note that in the above example, BaseDataDirectory is a class-level read-only/constant value.
This method can then be called as follows.
_database = InitializeLocalDatabase(_database, LocalDatabaseName,
    typeof(LocalTodo),
    typeof(LocalUser));
Note that in the above example, _database is a class-level field.
As you can see from the above code samples, the InitializeLocalDatabase method takes care of checking if the database has already been initialised and also creates the directory for the database file, if required.
The CreateTables method is used to create multiple database tables at the same time.
I recommend that you initialise your local database connection as soon as possible after your app starts up so that the database will be available to any code that needs to access it.
Inserting records
Now that your database and tables have been initialised, you’re now ready to begin inserting records.
SQLite-net makes it really easy to insert records using entities.
Here’s a quick example.
var newTodo = new LocalTodo { Title = "Buy milk", UserId = 1 };

database.Insert(newTodo);
As you can see from the above code, SQLite-net provides a very simple to understand abstraction over SQLite and will automatically create the necessary SQLite command required to insert the appropriate record into the database.
Getting records
Querying a database to retrieve records based on specified criteria is typically where an ORM becomes really useful and this is where SQLite-net really shines.
The Table method returns a queryable interface that is able to translate Where, OrderBy, and Take queries into the native SQL that the SQLite database engine understands.
Here is an example that gets a collection of Todo records from the database.
var todos = database.Table<LocalTodo>()
                    .OrderBy(t => t.Title)
                    .ToList();
The above code gets all of the records from the ‘Todos’ table ordered by the ‘Title’ column and then uses LINQ to convert the records into a list of LocalTodo objects that we can work with.
Getting an individual record
To get an individual record we can use the Find method and either pass in the primary key value or a predicate, as per the following code sample.
int id     = 1;
var myTodo = database.Find<LocalTodo>(id);

int userId  = 1;
var buyTodo = database.Find<LocalTodo>(t => t.Title.StartsWith("Buy") && t.UserId == userId);
Note that I recommend you always use the Find method when looking for an individual record. You could instead use the Where method in combination with FirstOrDefault, however, this will potentially return multiple rows from the SQLite database which then have to be filtered in-memory using LINQ.
Updating records
Updating records is similar to inserting records.
Following on from the previous code sample, let’s update a property of the myTodo object and then use the Update method to update the associated record in the database.
myTodo.Completed = true;

database.Update(myTodo);
Note that the database table must have a primary key in order to update records in this way.
Deleting records
You can pass in either the primary key or the object to delete to the Delete method in order to remove a record from the database.
Below is an example of how to do this.
int rowsDeleted = database.Delete(myTodo);
The DeleteAll method can also be used to remove all records from a specific database table.
Custom queries
One of the things I love about SQLite-net is that it not only provides a really neat set of methods for interacting with database records at a high level, but it also gives you the ability to issue raw SQL queries and commands in a safe way using parameters whenever you need to.
Below is an example of a simply SELECT query.
var filteredTodos = database.Query<LocalTodo>(
    "SELECT * FROM Todos WHERE UserId = ? ORDER BY Title", userId);
SQLite-net is still able to help us out here by automatically mapping the results to the custom query to the LocalTodo object.
Question mark characters are used to represent positional SQL parameter values and you can specify as many as needed to fulfill the query requirements.
Custom commands
In addition to custom SQL queries to retrieve records, you can also execute ad-hoc queries to insert or update records, and you can issue SQLite-specific commands too.
Below are a couple of examples for reference.
int modifiedRows = database.Execute("UPDATE Todos SET Completed = 1 WHERE UserId = ?", userId);

var shrinkCommand = database.CreateCommand("vacuum");
shrinkCommand.ExecuteNonQuery();
The first line of code updates all Todo records to ‘Completed’ for the specified User ID.
The second part of the code executes the ‘vacuum’ command which is a SQLite-specific command which shrinks the database file to free up unused space.
Transactions
SQLite supports database transactions and SQLite-net provides a really neat way to implement these.
See the code sample below.
database.RunInTransaction(() =>
{
    database.DeleteAll<LocalTodo>();
    database.InsertAll(todos);
});
Any database commands that are issued within the Action that is executed by the RunInTransaction method are all run in the context of a SQLite transaction. This means that all of the database commands will either be committed or they will all be rolled back if one of them fails for any reason.
Creating a service layer
When implementing local data storage for your app, it’s usually a good idea to introduce a layer of abstraction.
I recommend creating an interface similar to the following.
public interface ILocalDataServices
{
    void Initialize();

    LocalTodo CreateTodo(LocalTodo todo);
    LocalTodo GetTodo(int id);
}
You can then implement a concrete implementation class e.g. SQLiteDataServices and implement the methods you need for your specific project.
With an abstraction like this in place, you can separate your local data access logic from the rest of your application and potentially swap out the underlying implementation to use a different SQLite library, or even a different local data storage system, if required.
Of course, using an interface also helps with unit testing and with dependency injection.
If you are developing a .NET desktop app or Xamarin app, I recommend using TinyIoC – “an easy to use, hassle free, Inversion of Control Container” (as per the GitHub ReadMe).
Typical scenarios
As stated near the beginning of the article, allowing the user to work offline or when network connectivity is poor are typical examples of why you would employ a local data storage solution for your app.
In these situations, your software will either operate offline by default and upload data to a server whenever a network connection is available, or the code will fall back to local database access if an API call fails due to a poor connection.
As an example, for a Xamarin project, you can use code that is similar to the following to check if you have a network connection.
if (Connectivity.NetworkAccess == NetworkAccess.None)
{
    // Use local cache.
}
Note that for native Android apps your app will need the ACCESS_WIFI_STATE permission in order for the above code to work.
Caching is another common reason to use local data storage. If you can avoid expensive API calls and provide a faster experience for your users you are sure to get better feedback from your user base.
A simple implementation of caching would be to store a cache expiration date/time value after retrieving data from an API and then use data from the local database (i.e. cache) until the cache period has expired.
if (_cacheExpiration == null || _cacheExpiration.Value < DateTime.UtcNow.AddMinutes(-1))
{
    // Cache period expired - call API.
}
Of course, you can make this more sophisticated according to your requirements and potentially use a caching framework should your requirements become more complex.
Tools
While in the process of developing an app that connects to a SQLite database, it can be very useful to view the schema and contents of the database visually as you go along.
I highly recommend SQLite Browser. It is free and works on both Windows and Mac.
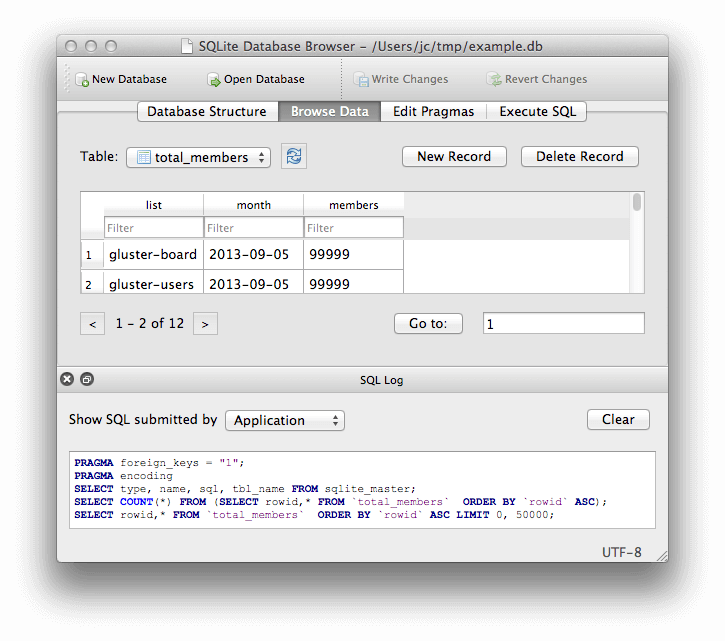
SQLite Browser allows you to create new databases and open existing databases.
It allows you to create and amend your database schema and you can view and edit data quickly and easily.
You can also execute SQL queries and view the results and it comes with a number of other features which you will find useful while developing your app.
Summary
In this article, I have covered how to implement local data storage for your app using SQLite.
I’ve utilised the SQLite-net library via the SQLite-net-pcl NuGet package to simplify the interaction with the local database and I’ve demonstrated how to get started with its usage.
In the final sections, I have made some recommendations regarding how to abstract your local data storage code and typical scenarios where having a local data storage system proves to be useful.
Lastly, I’ve introduced you to SQLite Browser which is an invaluable tool that helps you to view and edit your local data in a visual manner.
Comments