

Having the facility to send emails directly from your database engine is a hugely useful feature and this is exactly what the Database Mail functionality in SQL Server provides.
With Database Mail, you can send email alerts when specific database events occur, or send query results and reports to users automatically on a scheduled basis. These are just a couple of examples of specific use cases that can add real value to an organisation.
This article aims to provide a straightforward walkthrough of how to set up Database Mail via the SQL Server Database Mail setup wizard and then send your first email. Following the setup steps, I cover how to make use of the Database Mail setup by sending emails via SQL scripts.
The basics
Before you can use SQL Server Database Mail, some setup work needs to be performed. This includes enabling Database Mail for your SQL Server instance and creating a ‘profile’.
At least one profile containing one or more mail accounts needs to be configured prior to sending your first email via Database Mail. Profiles are a very useful concept, as amongst other things they allow you to control which users and groups have access to send emails.
A profile contains various settings such as retry attempts, timeouts, and logging settings. A profile also holds one or more mail accounts that contain the SMTP server settings. This means that your mail credentials are stored securely as part of the profile mail accounts so that you don’t have to have to worry about protecting them in your SQL code.
The idea of having more than one mail account within a profile is to provide redundancy. Mail accounts can be prioritised within the profile, meaning that if an email fails to send via the primary account, Database Mail can revert to the second account, then the third and so on.
Setup steps
Now that we have a rudimentary understanding of how the Database Mail setup works at a high level, let’s look at the actual setup steps we need to carry out before we can send our first email.
I’m going to keep things as simple as I can to help get you up and running as quickly as possible.
Important Note: If you are using SQL Server Express the setup steps shown in the following sections will not work, as there is no GUI support for Database Mail in free editions of SQL Server. I will cover how to set up Database Mail via T-SQL in a future article. The T-SQL setup approach works for all editions, including SQL Server Express.
Configure Database Mail
The first step is to locate the Database Mail configuration wizard for the SQL Server instance that you want to enable Database Mail for.
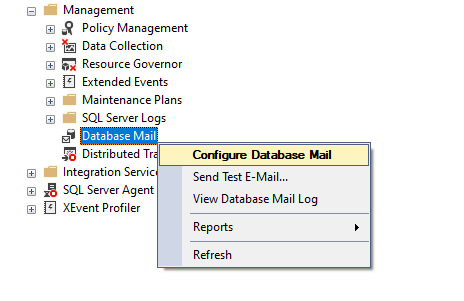
To do this, log into the appropriate SQL Server instance, and expand the ‘Management’ node.
Now right-click on ‘Database Mail’ and select ‘Configure Database Mail’ from the context menu.
Note that I’m using SQL Server Management Studio v18.4 with SQL Server 2019 for this walkthrough. However, Database Mail has been available since SQL Server 2005 and the setup steps will be very similar to those shown in the sections that follow.
After selecting the ‘Configure Database Mail’ option you’ll be greeted by the Welcome page of the Database Mail Configuration Wizard.
Welcome page
The Welcome page briefly explains what Database Mail is and what the wizard allows you to do.
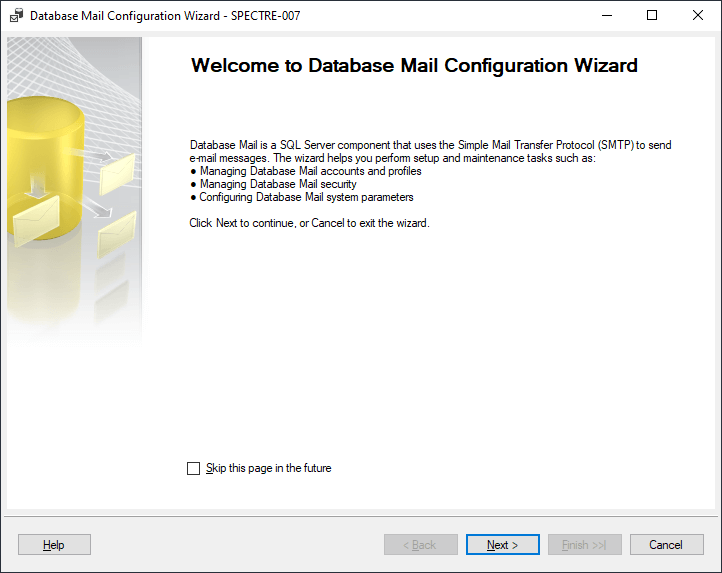
Press the ‘Next’ button to proceed to the next step of the wizard.
Select Configuration Task
We need to select the type of configuration task that we want to carry out.
Since we are setting up Database Mail for the first time, we’ll want to leave the radio button selection on the default option i.e. ‘Set up Database Mail by performing the following tasks:’.
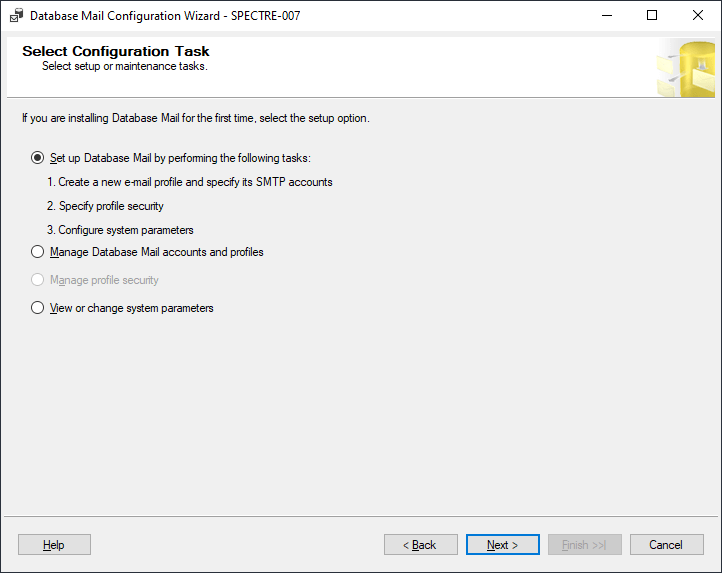
Press the ‘Next’ button to proceed to the next step.
Enable Database Mail
Providing Database Mail hasn’t previously been configured for the current SQL Server instance, you will be prompted if you would like to enable it automatically, as per the dialog below.
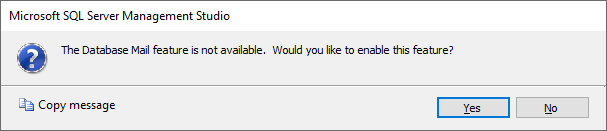
Press the ‘Yes’ button to enable Database Mail and proceed to the next step of the wizard.
New Profile
The next step is to configure a new profile.
From the ‘New Profile’ page, we need to configure a profile name and one or more mail accounts.
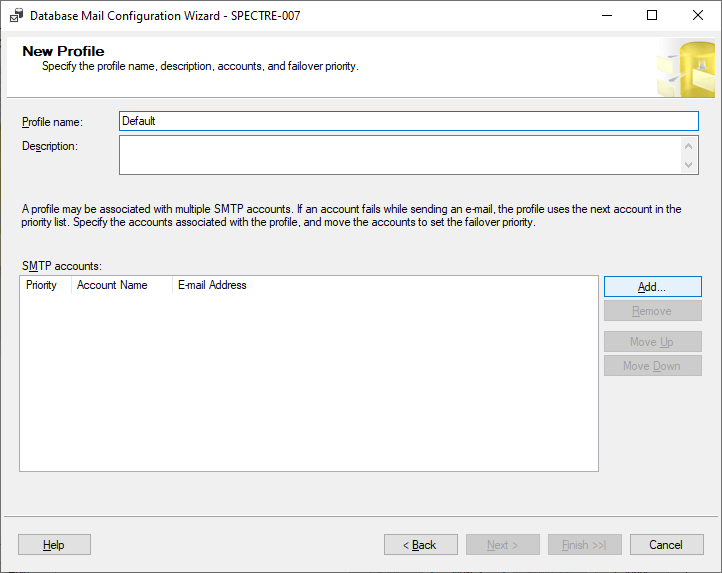
Enter a suitable name for the profile e.g. ‘Default’.
Now we need to add a mail account containing the SMTP settings that going to be used to send emails.
Click on the ‘Add…’ button to open the New Database Mail Account dialog.
New Database Mail Account
The New Database Mail Account dialog allows the account and SMTP settings to be configured.
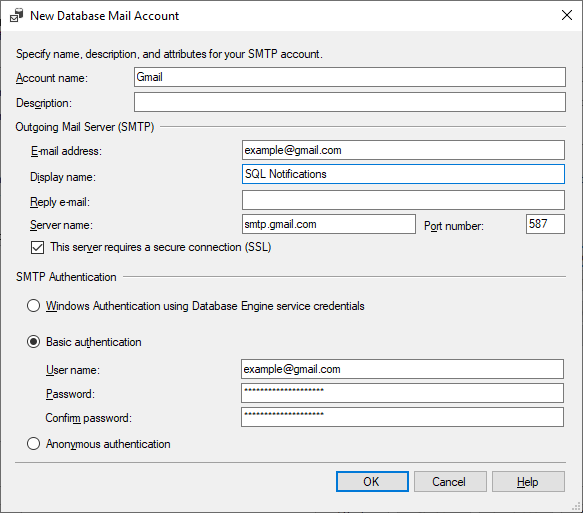
Start off by entering an ‘Account name’ for the new mail account, then enter the ‘Outgoing Mail Server (SMTP)’ settings and the ‘SMTP Authentication’ settings.
Note that some of the fields such as ‘Display name’ and ‘Reply e-mail’ are optional.
The SMTP details will vary depending on your email provider. As an example, if you are using Gmail, the relevant instructions can be found here.
Click the ‘OK’ button when you are finished configuring the mail account settings.
The new mail account will now be added to the list of ‘SMTP accounts’ back on the ‘New Profile’ page of the wizard.
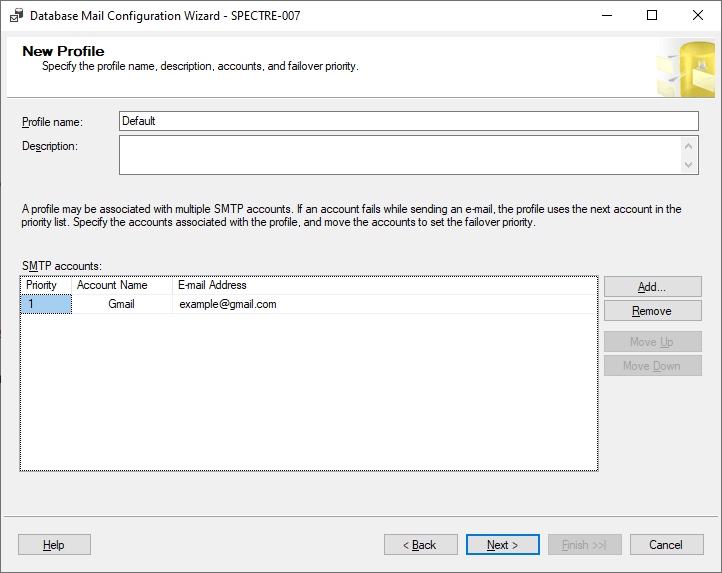
If you want, you can add more mail accounts as discussed previously to add redundancy. However, for the purposes of getting things set up quickly, one account will be enough for us to start with.
Click the ‘Next’ button to proceed to the next step.
Manage Profile Security
Now we get to choose how the profile is secured.
Profiles can be made ‘Public’ and are therefore accessible to any user or role that has access to the mail host database (msdb).
However, profiles can also be made ‘Private’ and can then only be used by specific groups or users. This is a really powerful way of controlling email permissions.
However, to keep things as simple as possible for this walkthrough, we’ll use a ‘Public’ profile.
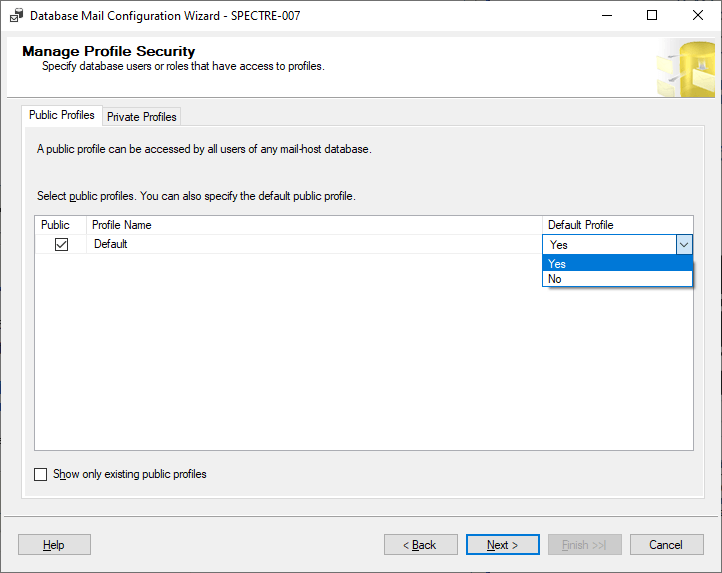
Tick on the ‘Public’ checkbox and select ‘Yes’ from the ‘Default Profile’ combo-box.
Setting the profile as the default means that we don’t need to specify a particular profile to use when sending an email e.g. via a SQL script.
Note that only one profile can be set as the default.
Press the ‘Next’ button to proceed to the next step.
Configure System Parameters
Before finalising the setup, there is the opportunity to configure system parameters.
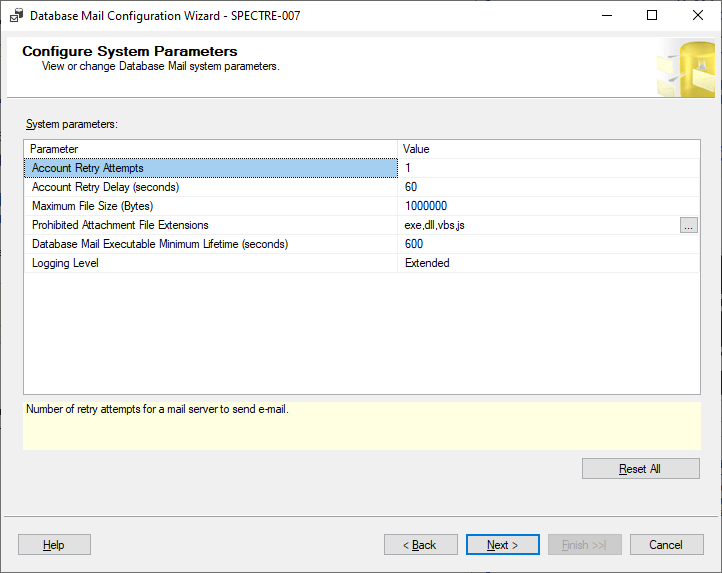
Help text is provided for each of the available system parameters if you are curious about what effect they have.
By default, the ‘Logging Level’ is set to ‘Extended’ which results in errors, warnings, and informational messages being logged. If you also want to log success and additional internal messages, you can select the ‘Verbose’ level instead.
The default settings are fine for testing purposes.
Note that you may want to increase the ‘Account Retry Attempts’ value for a production setup.
Press the ‘Next’ button to proceed to the final step.
Complete the Wizard
The last page of the wizard provides a summary of what actions the wizard is about to carry out.
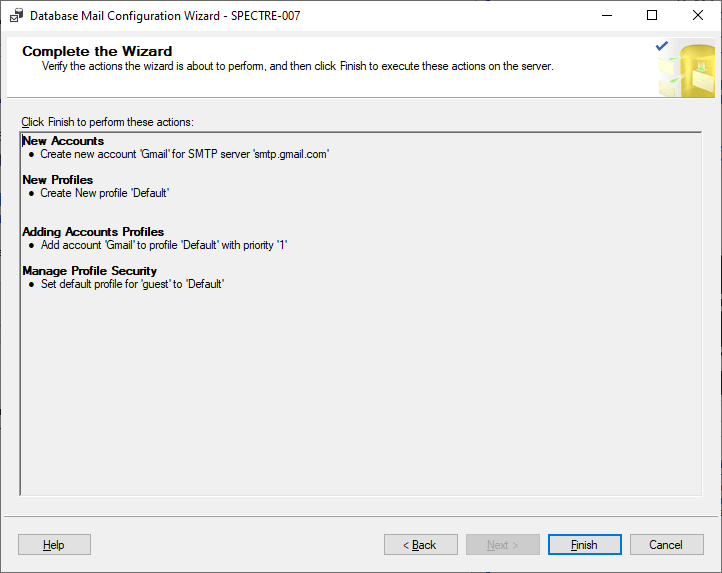
Press the ‘Finish’ button to complete the wizard and proceed to carry out the setup actions.
Configuring…
After finishing the wizard, the progress of each action that is executed is displayed.
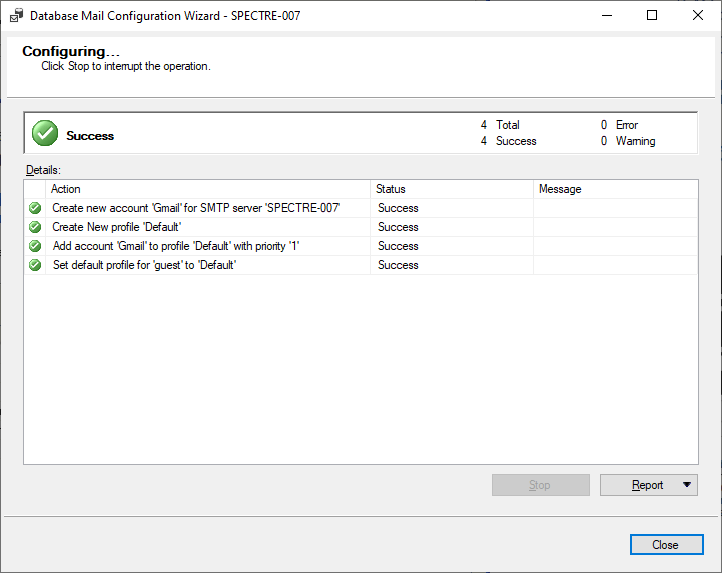
Usually, it doesn’t take very long for the setup actions to complete. If all goes well you should receive a green tick and a ‘Success’ status for each action that was carried out.
Database Mail is now set up and we’re ready to test out our new profile!
Testing
Database Mail offers a useful email testing feature that allows us to verify that our mail account settings are correct and that nothing is blocking our emails from being sent.
Send Test E-Mail…
The email testing feature can be accessed by right-clicking on ‘Database Mail’ within the ‘Management’ node of your SQL Server instance and selecting the ‘Send Test E-Mail…’ option from the context menu that appears.
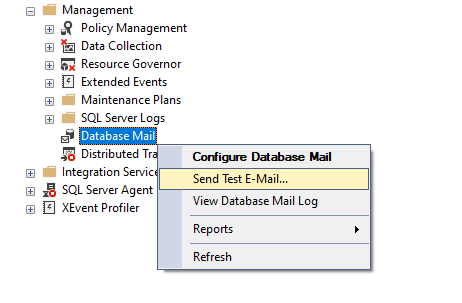
After selecting the ‘Send Test E-Mail…’ option, the Send Test E-Mail dialog will appear.
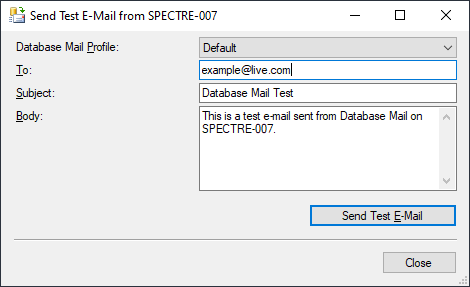
Within the Send Test E-Mail dialog you can select the ‘Database Mail Profile’ to use if you have more than one profile set up.
Enter the appropriate values into the ‘To’, ‘Subject’, and ‘Body’ fields and then press the ‘Send Test E-Mail’ button.
A further dialog will be displayed indicating that your test email has been queued for processing.
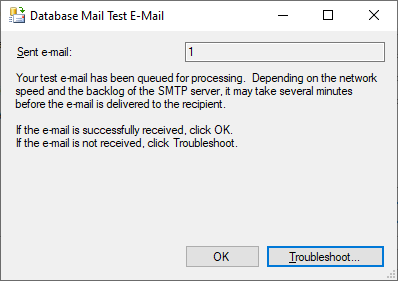
Now check the inbox of the email account that you sent the test email to and press the ‘OK’ button to close the dialog.
Checking the test email
If everything is set up correctly you should have received a test email with the subject and body that you specified.
If you didn’t receive the test email, chances are that your mail account settings are invalid, or perhaps the email has been blocked by a firewall.
When an email fails to send, the first thing you should check is the Database Mail Log. You can access this by right-clicking on ‘Database Mail’ within the ‘Management’ node of your SQL Server instance and selecting the ‘View Database Mail Log’ option from the context menu.
The SQL Server ‘Log File Viewer’ will appear, displaying all of the Database Mail log entries which you can inspect.
Test email problems
There could be many different reasons for your email not sending, however, let me provide you with a quick example of a common error you may see in the logs if you are using a Gmail account.
The mail could not be sent to the recipients because of the mail server failure. (Sending Mail using Account 1 (2021-08-12T20:42:47). Exception Message: Cannot send mails to mail server. (The SMTP server requires a secure connection or the client was not authenticated. The server response was: 5.7.0 Authentication Required. Learn more at).
If this problem occurs and you have definitely entered the correct credentials, then the problem could be related to 2-Step Verification. If 2-Step Verification is enabled for your account, then you’ll need to create an ‘App password’ that can be used by Database Mail.
You set up an App password via the Security area of your Google Account.
Under the ‘Signing in to Google’ section of the Security page, click on ‘App passwords’.
You’ll be prompted for your Google Account password before you can proceed further.
Once you are on the App passwords page, select the ‘Other (Custom name)’ option from the ‘Select app’ combo-box, enter a suitable name e.g. ‘Database Mail’, then click the ‘Generate’ button to see the App password within the ‘Generated app password’ dialog.
Note that after the ‘Generated app password’ dialog has been closed you won’t be able to see the password again.
Sending emails from SQL
Ok, so it’s all well and good having Database Mail set up and sending test emails, but how do we actually make practical use of Database Mail?
Before wrapping up this article, I’m going to show you two examples of how to send emails with Database Mail from SQL.
Email with subject and body
Below is one of the simplest examples of how to send an email from SQL using Database Mail.
EXEC msdb.dbo.sp_send_dbmail
    @profile_name = 'Default',
    @recipients   = 'example@live.com',
    @subject      = 'Database Mail SQL Test',
    @body         = 'Hello from Database Mail!';
The sp_send_dbmail stored procedure allows us to send emails from SQL by leveraging Database Mail profiles.
Note that the usage of the msdb.dbo. database and schema prefix in the above example is important. If we don’t specify this, the sp_send_dbmail stored procedure won’t work unless we are running our query in the context of the msdb system database.
In the above basic example, we are specifying the Database Mail profile to use for sending the email, the recipients (the ‘To’ addresses), the subject, and the body of the email.
Note that if you have a default profile configured, you can leave out the @profile_name parameter. Database Mail will then revert to the default profile you have chosen.
If you’ve followed all of the setup steps and you execute the above query, you should receive an email! Don’t forget to change the @recipients parameter first 🙂
Email with attached query results
A really good use case for Database Mail is sending the output of SQL queries to users e.g. monitoring results and custom reports.
EXEC msdb.dbo.sp_send_dbmail
    @profile_name		 = 'Default',
    @recipients			 = 'example@live.com',
    @subject			 = 'Database Mail SQL Query Test',
    @body			 = 'Please see the attached report.',
    @query			 = 'SELECT TOP(200) * FROM DimProductCategory',
    @execute_query_database	 = 'AdventureWorksDW2017',
    @attach_query_result_as_file = 1;
In the above example, I have introduced some additional parameters to the SQL.
The @query parameter allows us to specify the SQL query that we want to run prior to the email being sent.
The @execute_query_database parameter is used to specify the name of the database that we wish to execute the query against.
The @attach_query_result_as_file parameter specifies that the query results should be attached as a text file to the email.
The sp_send_dbmail stored procedure features many more parameters that provide you with a lot of different options and control over the emails that you are sending.
I encourage you to check out the Microsoft Docs to inspect the full range of available parameters.
Summary
In this article, I started off by briefly explaining the premise of the Database Mail feature within SQL Server and the flexibility that it offers through its ability to store many profiles consisting of different mail accounts.
I then walked through how to set up Database Mail step by step with screenshots to help guide you through the process.
I provided instructions on how to send test emails from Database Mail and looked at an example of a common error message and how to solve it when using a Gmail account.
Lastly, I showed two examples of how to send an email from SQL using Database Mail, including how to attach the results of a custom SQL query to an email as a file.
Comments