
NCache is an open-source, in-memory, distributed cache written in .NET and usable by several different languages and frameworks.
A distributed cache pools together memory from one or more servers into a single data store that can be accessed from a consuming application that is typically hosted on another server.
The cache can be used to speed up an application by allowing data that is accessed frequently to be stored and retrieved from memory, rather than performing expensive database or API lookups every time that data needs to be retrieved.
.NET defines a generic interface for working with distributed caches and the developers of NCache, Alachisoft, provide a convenient implementation of this interface via a NuGet package to make working with NCache very straightforward.
In this article, I will walk you through what NCache is and discuss its features. I’ll then show you how to install NCache on your local machine and create a sample application that connects to the NCache server. The code will demonstrate how to store and retrieve data using the standard distributed cache interface within an ASP.NET Core web app.
A bit about NCache
NCache is a caching product developed by Alachisoft; a US-based company headquartered in Dallas, Texas. Alachisoft offers Professional, Enterprise, and Open Source editions of NCache to suit different needs.

According to the official Alachisoft website, NCache can be summarised as follows.
NCache is an Open Source in-memory distributed cache for .NET, Java, and Node.js. NCache is extremely fast and linearly scalable and caches application data to reduce expensive database trips. Use NCache to remove performance bottlenecks related to your data storage and databases and scale your .NET, Java, and Node.js applications to extreme transaction processing (XTP).
NCache is written entirely in .NET / .NET Core and focuses very heavily on providing raw performance for demanding applications that need to handle a lot of data requests. With the help of its Client Cache feature, NCache gains a performance boost that can make it even faster than Redis.
In addition to .NET clients, the Java and Node client support is excellent and NCache will run on both Windows and Linux servers (Enterprise and Professional editions).
If you are seeking to enhance your application performance and scalability, NCache provides a robust caching solution. I encourage you to check out the NCache Features webpage to help you understand the wide array of features that NCache offers.
In the next section, I’ll walk you through the NCache setup process so that you can try it out.
Setting up NCache
Before you can start using NCache, you’ll need to set it up somewhere.
I’ll cover the possible ways of doing this further below and then present the exact installation steps you’ll need to follow so that you can evaluate if NCache could be a good fit for your application.
Installation options
There are a few different options to choose from when it comes to NCache installation.
Cloud deployment
If your application is hosted in the cloud it makes sense to deploy your caching store to the same cloud platform for best performance. Alachisoft provides pre-configured NCache options in two of the most popular cloud platforms, namely Azure and AWS.
In the Azure Marketplace, you’ll find options for setting up fully-managed SaaS versions of NCache. If you need more control, there are also a number of Virtual Machine options available, running either Windows or Linux.
Similar options are available in the AWS Marketplace.
Docker
Docker is another popular option for NCache deployment.
Alachisoft provides Docker images and Docker files that allow you to get up and running quickly.
By using Docker you’ll be able to guarantee that the server setup is the same across development and production environments, and in the future, you can easily move the cache between servers, services, and clouds, as and when the need arises.
On-premises/development
If you are planning to deploy NCache to an on-premises server, or you want to set up NCache on your local machine for development and testing purposes, you should use an NCache installer.
This is the option I’ll be covering in this article for the purposes of getting started.
Note that the installation steps provided are specific to Windows machines.
Installation steps
To install NCache on your machine, you’ll first need to head over to the Downloads page on the NCache website and select a download link.
To keep things as simple as possible, I’m going to walk through the installation steps for the Open Source edition of NCache. At the moment, the Open Source edition runs under .NET Framework 4.8 (as opposed to .NET Core).
Note that if you want to evaluate all of the features that NCache provides, you can alternatively install the Enterprise edition which is free for development purposes (the installation process is very similar).
Regardless of the chosen NCache edition, after you select the download link, you’ll need to enter your details to register as a user (no credit card details are required).
Note that a work email is required for anything other than the Open Source edition.
After registering your details, you’ll need to accept the license agreement. You can then press the ‘Download’ button to download the NCache installer file.
Installer launch
To start the installation process, run the NCache installer you downloaded to launch the setup program.
When you run the NCache installer you may receive a warning message stating that you do not have sufficient privileges to install NCache. If this message appears, you’ll need to launch a Command Prompt window as an administrator, navigate to the directory you downloaded the installer file to, and then run the installer from there.
To do this on Windows 10, type the term ‘cmd’ into your Windows search bar, then right-click on the ‘Command Prompt’ app and select the ‘Run as administrator’ option. You will then need to press ‘Yes’ on the Windows UAC prompt to confirm that you want to allow the app to make changes to your device.
After the Command Prompt window launches, use the cd command to change directory to your downloads folder.
cd c:\users\<user>\downloads
Note that you should replace the above path with one that applies to your situation.
Now type the name of the installer file (e.g. ‘ncache.oss.x64.msi’) and press the Enter/Return key to launch the setup program that hosts the installation wizard.
Installation wizard
After launching the installer, you will be greeted with the Welcome page of the installation wizard.
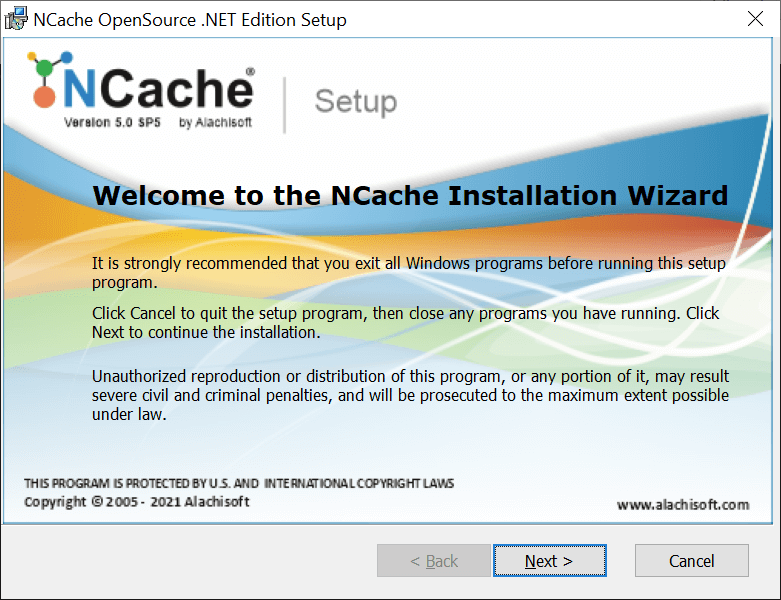
Press the ‘Next’ button to continue to the next step.
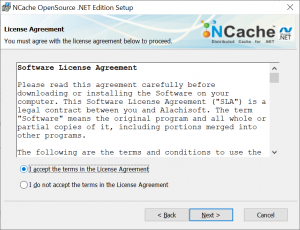
On the License Agreement page, select the first radio option to accept the license terms and then press the ‘Next’ button to proceed.
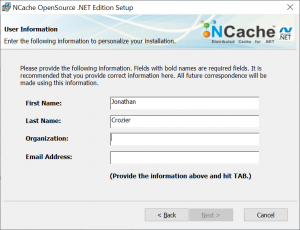
On the User Information page, enter the same details you specified when registering as a user on the Alachisoft website and then press the ‘Next’ button to continue.
Note that in the above screenshot, only the ‘First Name’ and ‘Last Name’ fields have been populated. The ‘Organization’ and ‘Email Address’ fields also need to be filled in before the ‘Next’ button becomes enabled.
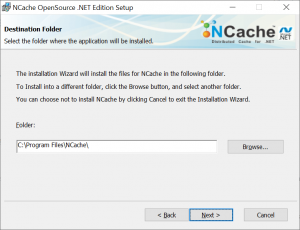
On the Destination Folder page, I recommend that you accept the default value and press the ‘Next’ button to proceed.
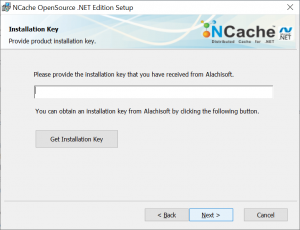
On the Installation Key page, enter the key you received via email after registering as a new user on the Alachisoft website and then press the ‘Next’ button.
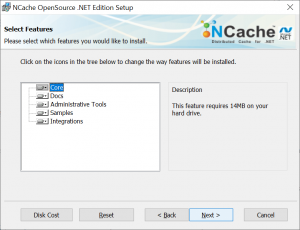
On the Select Features page, I recommend that you accept the defaults and press the ‘Next’ button.
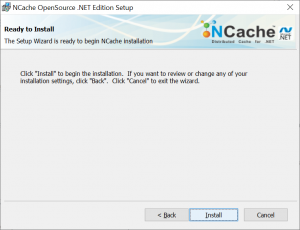
On the Ready to Install page, press the ‘Install’ button to begin the installation.
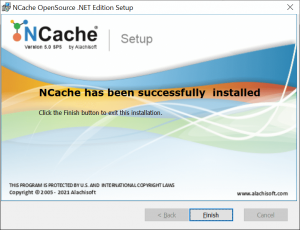
After the installation has been completed, a final page will be displayed confirming that NCache has been successfully installed. Press the ‘Finish’ button to close the setup program.
Installation checks
After you have completed the NCache installation process, I recommend that you carry out some basic checks to make sure that the installation was successful.
First, verify that the ‘NCache’ Windows Service has been registered and is running. You can check this via the ‘Services’ tab within Task Manager or by running ‘services.msc’ from a ‘Run’ dialog (Win + R).
Next, check that a local cache is available for testing purposes. You can check this by navigating to the ‘NCache’ folder within your list of installed apps on the Windows Start Menu and launching ‘NCache PowerShell Management’ from there. This will open a PowerShell window listing several available cmdlets, as follows.
Clear-CacheExport-CacheConfigurationExport-CacheKeysGet-CacheClientStatisticsGet-CachesGet-CacheServerStatisticsGet-NCacheVersionRegister-NCacheOpenSourceStart-CacheStop-CacheTest-Stress
The Test-Stress cmdlet is an interesting function that connects to the specified cache and simulates lots of requests to stress-test the performance of the cache.
If you execute the Get-Caches cmdlet, a formatted table will be output displaying the available caches. This should include a cache named ‘demoCache’ with a ‘mirror’ scheme, and a second cache named ‘myCache’ with a ‘local’ scheme.
It is the ‘myCache’ cache that we will be connecting to from our demo application for testing purposes.
Using NCache in your application
There are four main things that you can use NCache for in your application, as follows.
- App Data Caching
- ASP.NET / ASP.NET Core Caching
- Pub/Sub Messaging and Events
- Full Text Searching (Distributed Lucence)
The above options present some interesting use cases, allowing you to use NCache to store ASP.NET sessions or as a SignalR backplane. Additionally, NCache can facilitate multiple publishers and subscribers in a decoupled pub/sub messaging setup and Full Text Searching is supported via Lucene.NET.
In the following sub-section, I’m going to cover the most common way to use NCache in your application which is App Data Caching. This is where you cache application data in memory, to reduce pressure on your database or API and thereby improve performance.
Connecting to NCache from code
In this section, I will show you how to connect to NCache from an ASP.NET Core web app.
The steps shown in the following sub-sections assume you are using Visual Studio 2022 or greater.
Project creation
To get started, create a new Visual Studio solution using the ‘ASP.NET Core Empty’ project template.
When creating the project set the Framework to .NET 6.0 and leave the ‘Do not use top-level statements’ checkbox unchecked.
After the project has been created, open the ‘Program.cs’ file and you should find the contents to be similar to the code shown below.
var builder = WebApplication.CreateBuilder(args);
var app = builder.Build();

app.MapGet("/", () => "Hello World!");

app.Run();
The project template defaults to using the Minimal APIs approach which results in a very small amount of application setup code compared to a standard ASP.NET Core project that uses a Startup class.
For simpler cases where a builder instance isn’t required, the code can be shortened even further, as follows.
var app = WebApplication.Create(args);

app.MapGet("/", () => "Hello World!");

app.Run();
However, in our sample application, we need to register some dependencies, so we’ll need to keep the code that initialises the builder instance. Make sure you keep the builder variable so that you can access the Services property it exposes.
If you run the application (using F5 or Ctrl + F5) your selected Web Browser should launch and you’ll see the text ‘Hello World’ rendered within the browser window.
Now that we have a very basic project created, we’re ready to look at how we can connect to NCache from our code.
IDistributedCache
A simple and loosely coupled way of connecting to a caching store with ASP.NET Core is to inject and use the IDistributedCache interface.
The IDistributedCache interface contains the following public methods.
In addition to the above, the interface defines a further four methods representing the synchronous versions of each method i.e. Get, Refresh etc.
You will find that there are also several extension methods available, such as SetStringAsync which makes it much easier to set string values instead of needing to convert strings to byte arrays as per the standard SetAsync method.
We’ll use the IDistributedCache interface in the code sample that is coming up shortly.
NuGet package
NCache provides a helpful NuGet package named NCache.Microsoft.Extensions.Caching that implements theIDistributedCache interface.
If you have an existing application and were previously using another caching provider (e.g. Redis) via theIDistributedCache interface, swapping to NCache can be very straightforward. All you need to do is install the NCache-specific NuGet package and then change your ASP.NET Core startup code to add the NCache distributed cache service in place of your previous cache.
If you are following along, go ahead and install the NuGet package into your test project now.
After installing the NuGet package, you’ll notice that some new files have been added to your project, as follows.
You won’t need to edit these files when working with your local cache for testing purposes. However, I’ve provided links to the relevant NCache documentation for each file above as they provide a lot of flexibility, allowing you to tweak many aspects of how the cache works for maximum performance.
Sample code
Now for the sample code that connects to NCache via the NuGet package. If you are following along, paste the full contents of the code block below into your ‘Program.cs’ file.
All of the code is in a single file to keep things as simple as possible for demonstration purposes.
using Alachisoft.NCache.Caching.Distributed;
using Microsoft.Extensions.Caching.Distributed;
using System.Text.Json;

// Create web app builder.
var builder = WebApplication.CreateBuilder(args);

// Configure services.
builder.Services.AddNCacheDistributedCache(c => c.CacheName = "myCache");
builder.Services.AddHttpClient();

// Build the app instance.
var app = builder.Build();

// Wire up the 'todos' GET endpoint.
app.MapGet("/todos", async (IDistributedCache cache, HttpClientFactory httpClientFactory) =>
{
    const string todosKey = "todos";

    IEnumerable<Todo>? todos;

    // Try getting the todos from the cache.
    var cachedTodos = await cache.GetStringAsync(todosKey);

    if (!string.IsNullOrEmpty(cachedTodos))
    {
        // Use the todos in the cache.
        todos = JsonSerializer.Deserialize<IEnumerable<Todo>>(cachedTodos);
    }
    else
    {
        // Get the todos from the 'JSONPlaceholder' API.
        var httpClient = httpClientFactory.CreateClient();

        todos = await httpClient.GetFromJsonAsync<IEnumerable<Todo>>(
            "https://jsonplaceholder.typicode.com/todos");

        // Store the todos in the cache.
        await cache.SetStringAsync(todosKey, JsonSerializer.Serialize(todos), new DistributedCacheEntryOptions
        {
            AbsoluteExpirationRelativeToNow = new TimeSpan(0, 0, seconds: 60)
        });
    }

    return todos;
});

// Run the app.
app.Run();

// Represents a 'Todo' item.
class Todo
{
    public int     Id        { get; set; }
    public int     UserId    { get; set; }
    public string? Title     { get; set; }
    public bool    Completed { get; set; }
}
Let’s walk through the key parts of the above code sample.
The first NCache-specific thing to point out is the AddNCacheDistributedCache method, which is used to configure NCache as the distributed caching service.
Notice how we only need to specify the cache name in the code (myCache). Unlike some other caching systems such as Redis, NCache uses a dedicated XML configuration file to configure the connection details, rather than a connection string.
After configuring NCache, the sample code calls the AddHttpClient method to add the IHttpClientFactory and related services so that we can make HTTP requests later on.
The MapGet method defines a ‘todos’ endpoint that returns a collection of todo items in JSON format to the browser. IDistributedCache and HttpClientFactory object instances will be injected automatically into the method when it is executed.
Within the main endpoint logic, the GetStringAsync method is used to check if a cache item with the specified key is present within the cache. The first time the endpoint is called the cache will be empty, so the method will return null.
Note that in the sample code a very simple cache key has been specified (i.e. ‘todos’). For real-world scenarios, you should consider a suitable naming convention/structure for your cache key names.
Next, a HttpClient instance is created and the GetFromJsonAsync method is used to make an API call to the JSONPlaceholder API to retrieve a collection of todo items.
The SetStringAsync method is then used to store the result of the API call as a string by serializing the todo items as JSON using the JsonSerializer.Serialize method. Notice that an instance of the DistributedCacheEntryOptions class is passed into the SetStringAsync method, specifying the duration for which the cached data should be stored via the AbsoluteExpirationRelativeToNow property.
For the next 60 seconds, calling the endpoint again will result in the GetStringAsync method finding the todo items in the cache and thereby avoiding further calls to the JSONPlaceholder API until the cached todo items have expired. The todo items are then simply deserialised using the JsonSerializer.Deserialize method before being returned.
That’s it for the code walkthrough. Hopefully, you can see how straightforward the IDistributedCache interface makes things when working with a distributed cache like NCache.
Getting more specific
The IDistributedCache interface makes it very straightforward to work with caches and provides a nice abstraction over the caching implementation. However, the simplicity of the interface can be limiting if you need more control over how you interact with the caching store.
If you need more control, you can instead turn to either the Alachisoft.NCache.OpenSource.SDK or Alachisoft.NCache.SDK NuGet packages which expose NCache-specific features via the CacheManager class.
The CacheManager.GetCache method can be used to get an object instance (cache handle) that represents the specified cache.
You can then use the Get method on the cache handle to retrieve an object from the cache based on the specified key. If there is an object in the cache it will be returned and deserialised, other it will be null.
To add an object to the cache the Add method on the cache handle can be used, passing a CacheItem object instance with an optional expiration TimeSpan.
If you want to use this approach instead, I encourage you to check out the NCache documentation which contains lots of great code samples and detailed information on all aspects of the NCache API.
Summary
In this article, I have introduced NCache and demonstrated how it can be integrated into an ASP.NET Core web app to act as the distributed caching store.
I started by providing some background on Alachisoft; the developers of NCache.
I then discussed the possible setup options and walked through the steps required to install NCache on your local machine for development and testing purposes.
Finally, I explained how to connect to NCache from an ASP.NET Core web app using the IDistributedCache interface and provided a code sample and explanation of the same.


Comments