
Before we begin, here’s a quick definition of the term “Get to grips” to mull over.
to make an effort to understand and deal with a problem or situation
If you’re looking into micro-service communication options for a greenfield project, gRPC is a great place to start.
In this article, I take a first look at the gRPC protocol and its recent adoption into the .NET Core Framework.
What is it?
Originally developed by Google, according to the official website “gRPC is a high-performance, open source universal RPC framework.”
As you may already know, RPC stands for ‘Remote Procedure Call’, but what about the ‘g’?
Nope, it’s doesn’t stand for Google! It simply stands for ‘general-purpose’.
As you will come to see later in this article, general-purpose is a good thing. Personally, I’m a great advocate of standards and conventions.
Going back to the official information source, the gRPC website also contains the following, fuller description of the protocol.
gRPC is a modern open source high performance RPC framework that can run in any environment. It can efficiently connect services in and across data centers with pluggable support for load balancing, tracing, health checking and authentication. It is also applicable in last mile of distributed computing to connect devices, mobile applications and browsers to backend services.
The above description clearly indicates that the primary focus of gRPC is on micro-service style communication. However, this is not the whole story.
gRPC is flexible enough to work for many different scenarios. Whether it’s the ‘single request, single response’ API calls that many of us are used to seeing with REST APIs, or more complex streaming scenarios.
The protocol is purposely language and platform agnostic and is heavily convention-based. This is a good thing as it cuts down greatly on the number of choices which a developer needs to make and thereby contributes greatly to consistency across a codebase.
Protocol support
There is great support for gRPC in many different languages, including but not limited to the following.
- C#
- C++
- Dart
- Go
- Java
- Kotlin
- Node
- Objective-C
- PHP
- Python
- Ruby
In the following sections, I provide a walkthrough on how to create your first gRPC project using C# and ASP.NET Core.
Along the way, I’ll explain the key parts of the protocol and the overall solution.
ASP.NET Core
Since .NET Core 3.0 there has been first-class support for gRPC in .NET as part of the Grpc.AspNetCore NuGet package.
Prerequisites
In order to create a gRPC project using ASP.NET Core, you’ll need a suitable IDE.
Before proceeding further I recommend that you download and install Visual Studio 2019 Community Edition which is free for non-commercial use.
Project creation
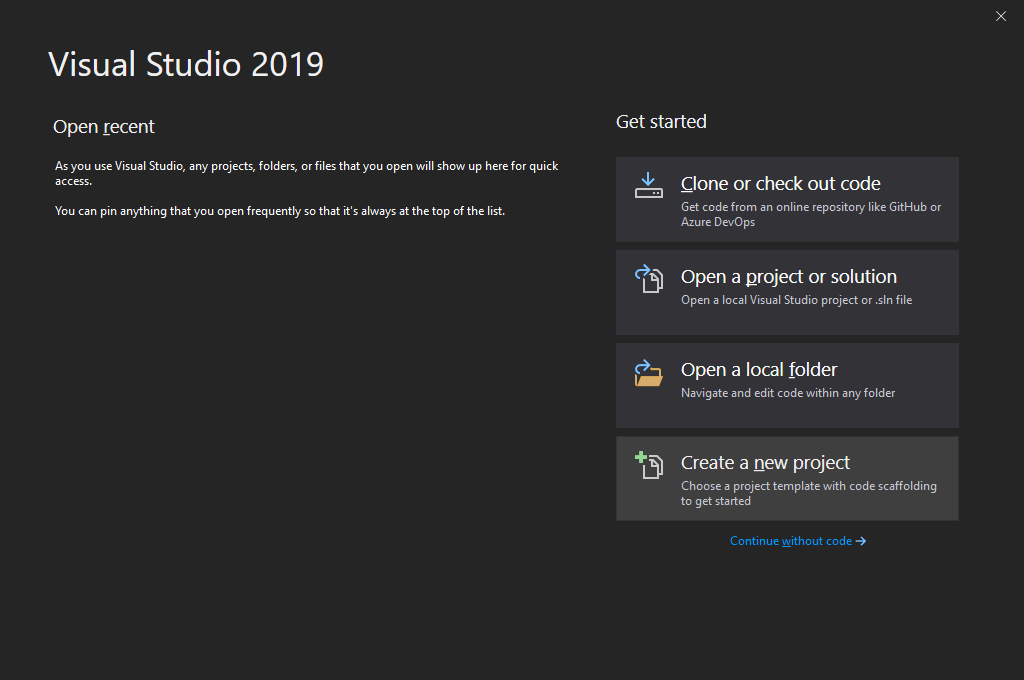
Launch Visual Studio, then from the startup screen click on the ‘Create a new project’ button.
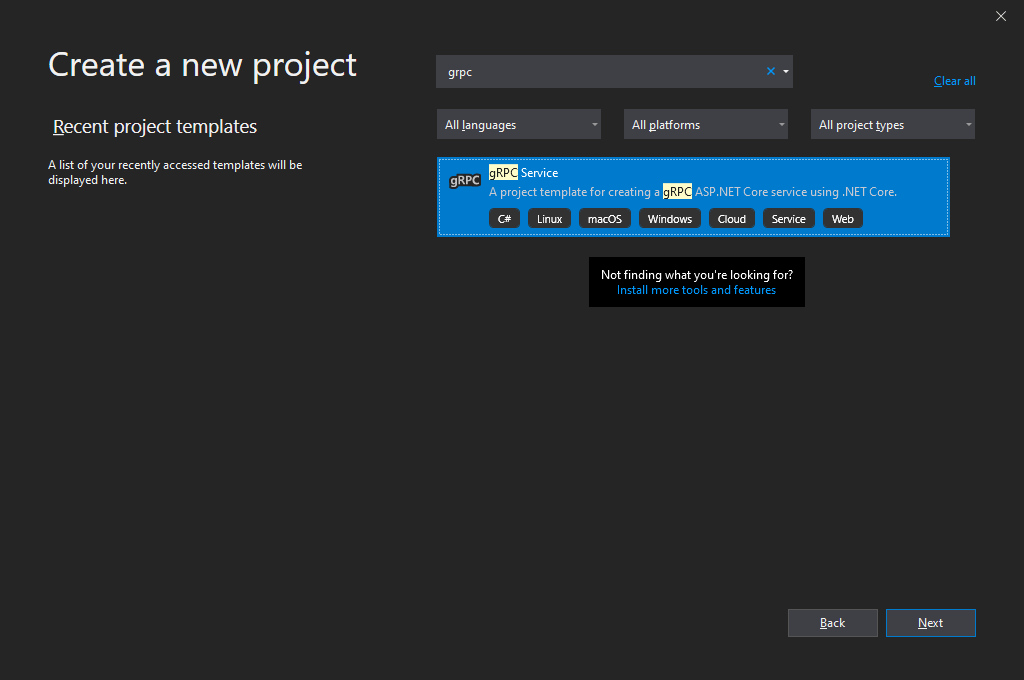
Next, you need to select the appropriate project type.
Type ‘grpc’ into the search box. The ‘gRPC Service’ project template should appear in the results, as per the screenshot below.
With the gRPC Service option selected, press the ‘Next’ button to proceed to project configuration.
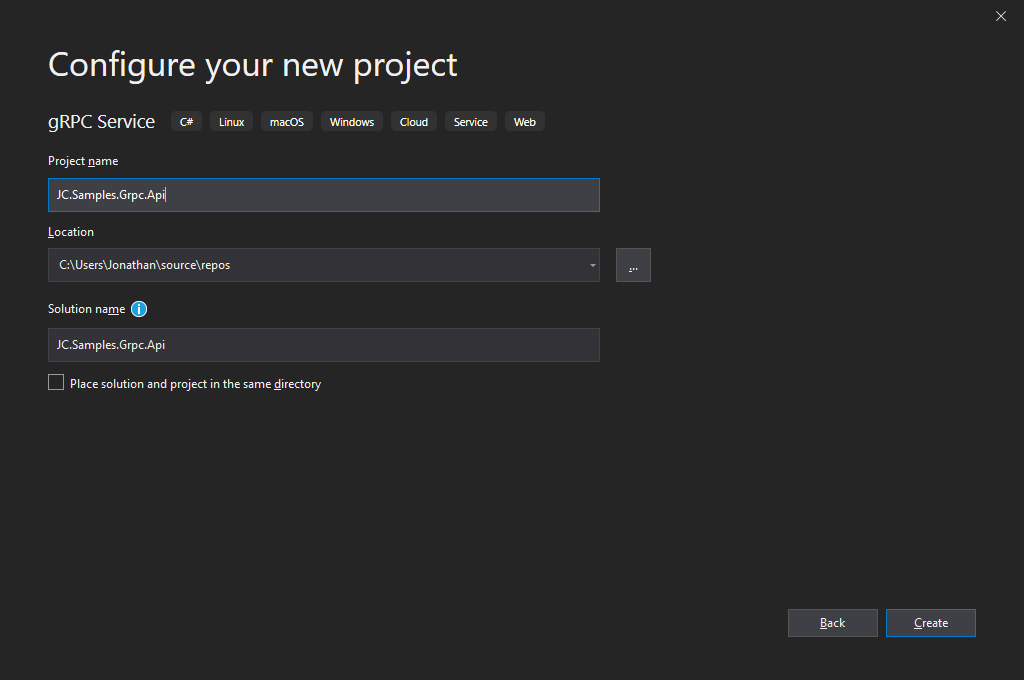
Enter a suitable name into the ‘Project name’ field.
You can amend the ‘Solution name’ and the ‘Location’ where the project will be created if so desired.
Click the ‘Create’ button when you are ready to proceed to the next step.
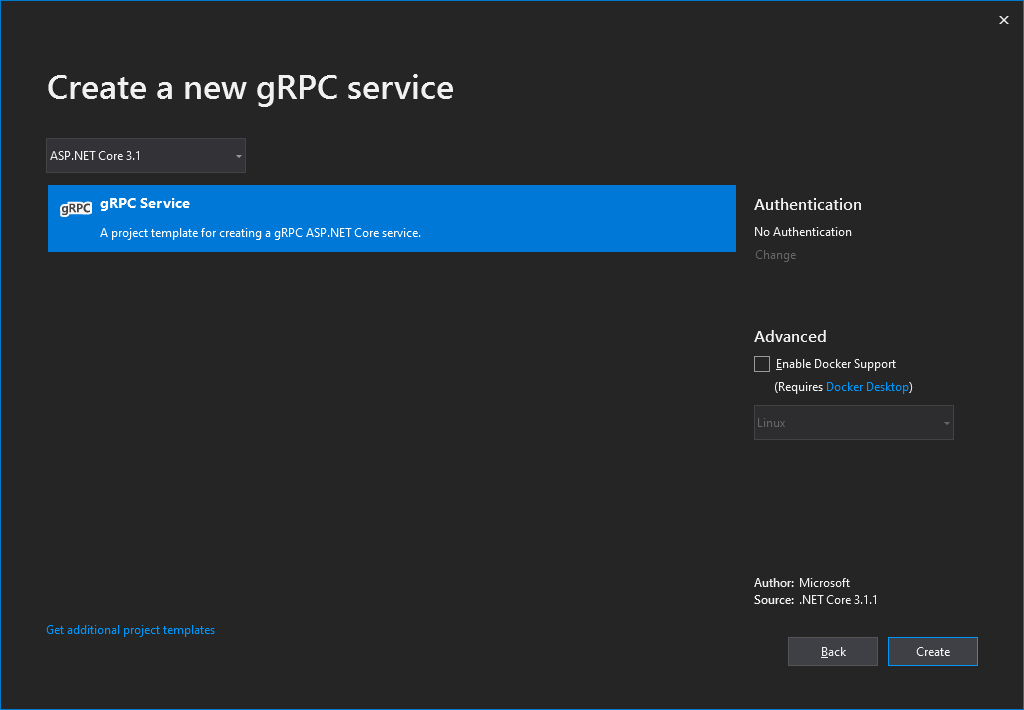
Before the project files are generated you get a chance to choose the Framework version (e.g. ASP.NET Core 3.1), as well as configure options for Authentication and Docker.
For the purposes of this walkthrough, leave everything at the default settings and press ‘Create’.
Now that the project has been created we can start inspecting the files which make up the project.
Project contents
The gRPC template project is very minimal, which is great since it makes it much simpler to get to grips with it and means that you don’t need to waste much time removing unneeded code or dependencies.
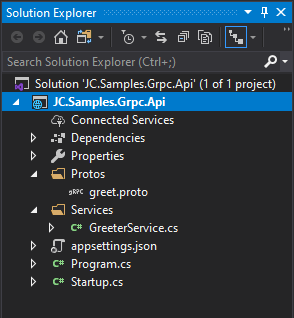
If you’re not familiar with ASP.NET Core already, whenever you see a class called Program this usually contains the Main method which is executed whenever the web app is launched. From the Main method, a website ‘host’ is built and run so that your application can start accepting web requests.
The Startup class contains mostly boilerplate ASP.NET Core code, however, in the ConfigureServices method which is called by the ASP.NET Core runtime on startup, you will notice the following code which adds the gRPC services.
services.AddGrpc();
Additionally, within the Startup class, in the Configure method which is also called by the runtime on startup, the endpoints are configured to support gRPC services.
app.UseEndpoints(endpoints =>
{
    endpoints.MapGrpcService<GreeterService>();

    endpoints.MapGet("/", async context =>
    {
        await context.Response.WriteAsync("Communication with gRPC endpoints must be made through a gRPC client. To learn how to create a client, visit: https://go.microsoft.com/fwlink/?linkid=2086909");
    });
});
This is all the setup work that is required to configure a basic gRPC application!
Now, let’s look at the GreeterService which is referenced in the above code and see how the interface for it is defined.
public class GreeterService : Greeter.GreeterBase
{
    private readonly ILogger<GreeterService> _logger;

    public GreeterService(ILogger<GreeterService> logger)
    {
        _logger = logger;
    }

    public override Task<HelloReply> SayHello(HelloRequest request, ServerCallContext context)
    {
        return Task.FromResult(new HelloReply
        {
            Message = "Hello " + request.Name
        });
    }
}
The first thing to notice about the GreeterService class is that it inherits from a nested class named Greeter.GreeterBase.
However, it appears that Greeter.GreeterBase is nowhere to be found within the solution. This base class is generated automatically in the background and its source can be found in the obj\Debug folder.
An ILogger instance is injected into the constructor of the service and is stored in a readonly field. This isn’t relevant though, it’s just useful to know that you can use the logger to record anything important when needed.
The most interesting part of the above code is the SayHello method. The method is an override of an automatically generated base class method. The method returns a Task of type HelloReply and accepts a request of type HelloRequest, as well as an instance of ServerCallContext which contains a set of very useful properties and methods.
In the sample code, a very simple response is generated and returned to the caller.
But where did the HelloReply and HelloRequest types come from you may ask? How did the signature of this method come to be?
Protobuf files
Within the ‘Protos’ folder which is part of the project, you’ll notice that there is a file called ‘greet.proto’.
The contents of the file look similar to the following.
syntax = "proto3";

option csharp_namespace = "JC.Samples.Grpc.Api";

package greet;

// The greeting service definition.
service Greeter {
  // Sends a greeting.
  rpc SayHello (HelloRequest) returns (HelloReply);
}

// The request message containing the user's name.
message HelloRequest {
  string name = 1;
}

// The response message containing the greetings.
message HelloReply {
  string message = 1;
}
This is a ‘protobuf’ file and it is where the service interface is defined.
Let’s inspect the key parts what make up the file.
syntax = "proto3";
The first line within the file defines the version of the protocol buffer language that is being used i.e version 3.
option csharp_namespace = "JC.Samples.Grpc.Api";
This is a special C# specific ‘option’ that helps the protocol package find the available RPC methods.
package greet;
This is the package specifier which is used to prevent name clashes between protocol message types.
service Greeter
This is the name of the service.
rpc SayHello (HelloRequest) returns (HelloReply);
This line defines a new RPC method called SayHello which accepts a model called HelloRequest and returns a model called HelloReply.
message HelloRequest {
  string name = 1;
}
Models are defined with the message keyword followed by the name of the model/message.
The sample request model contains a simple string property called name.
message HelloReply {
  string message = 1;
}
The sample response model is very similar to the request model and contains a simple string property called message.
Note that the Google Developers website has a Language Guide which details all of the possible options for defining gRPC services.
Whenever you edit and save a protobuf file inside a Visual Studio gRPC project, the auto-generated C# service definition classes are magically updated to reflect the changes.
Very cool! 😎
Reaching further
In this article, I’ve only scratched the surface of gRPC and covered how a very basic gRPC service is put together using ASP.NET Core.
After creating the sample project, I recommend that you try amending the sample protobuf file and then check the C# service class to see how the changes are reflected in the source code.
In future articles, I will look at how to define additional RPC endpoints, add authentication and create a client project to call the API.


Comments