

In a prior post, I introduced the key concepts behind using gRPC to develop an RPC service and walked through the process of creating a sample project.
In this article, I build on the previously discussed topics by adding an additional service and a client to the sample project.
After reading through the content below, you will be comfortable with how to connect to a gRPC service and invoke the methods it exposes using .NET Core.
Adding a new service definition
First up, open the sample project in Visual Studio. Please refer to my prior gRPC post for the steps to create the sample project if you haven’t done so already.
Within the Solution Explorer, right-click on the ‘Protos’ folder, click on ‘Add’, then ‘New Item’.
On the ‘Add New Item’ dialog, type ‘proto’ into the Search box and select the ‘Protocol Buffer File’ option.
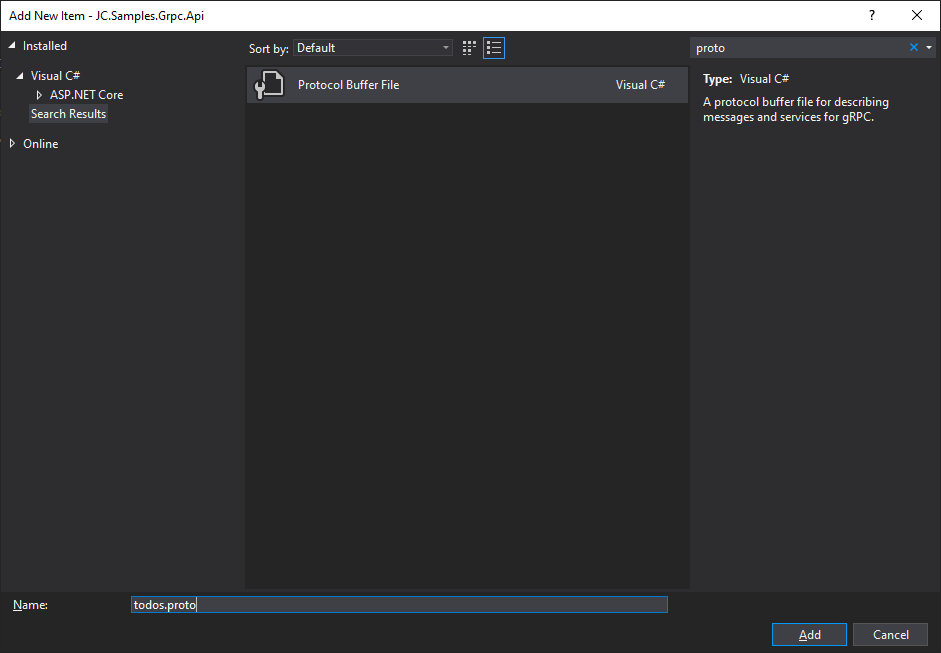
Give the file a Name of ‘todos.proto’, then press ‘Add’.
The newly created file should have a ‘syntax’ line and an ‘option csharp_namespace’ line as a starting point.
Update the contents of the proto file to the following (alter the namespace to match your project namespace).
syntax = "proto3";

option csharp_namespace = "JC.Samples.Grpc.Api";

package todos;

// The todo service definition.
service Todos {
  // Gets a collection of Todos.
  rpc GetTodos (TodoRequest) returns (TodoResponse);
}

// The request message containing the ID of the User to get Todos for.
message TodoRequest {
    int32 userId = 1;
}

// The response message containing the collection of Todos.
message TodoResponse {
    repeated Todo todos = 1;
}

// Represents a 'Todo' item.
message Todo {
    int32 id = 1;
    int32 userId = 2;
    string title = 3;
    bool completed = 4;
}
The proto file defines the interface of a new service that will allow clients to retrieve ‘Todo’ items for a specified User ID.
The file is very similar to the ‘greet.proto’ file which is included in the standard gRPC service project template. However, there a couple of new concepts to point out.
I’m making use of some new data types such as int32 and bool. You can view the full list of available types on the Language Guide page of the Google Developers website.
I’ve also used the repeated keyword to indicate that the Todo field within the TodoResponse message can be repeated any number of times i.e. this field is intended to represent a list of items.
Registering the service
Now that we’ve defined the new service, we need to register it.
To do this, right-click on the project node within Solution Explorer, click on ‘Add’, then ‘Service Reference…’
This will open the ‘Service References’ user interface and you should see that there is already an entry for the ‘greet’ service.
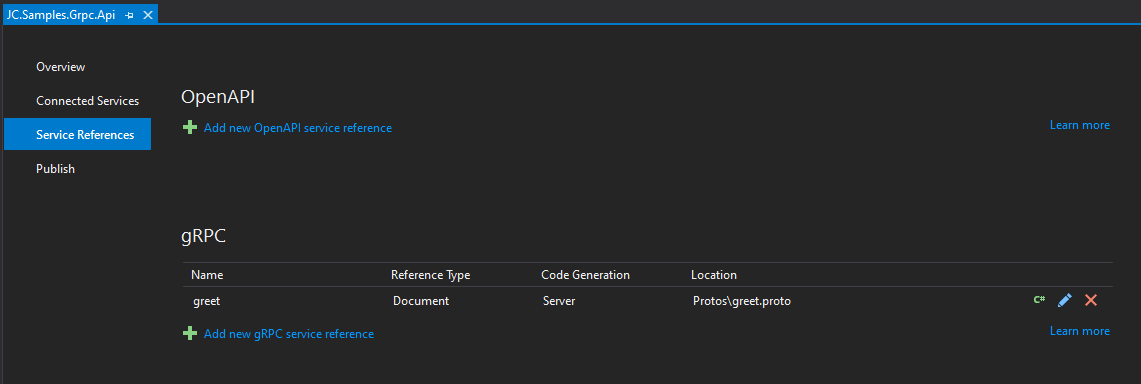
Click on the ‘Add new gRPC service reference’ link.
To the right of the ‘File’ field, click the ‘Browse…’ button then navigate to the ‘todos.proto’ file within the ‘Protos’ folder, open it and click ‘OK’.
After doing this, Visual Studio will automatically trigger the generation of C# code for the service classes and other types by running the protocol buffer compiler in the background.
Implementing the service code
Although the necessary C# types have been automatically generated we still need to create a service class where we can override the automatically generated RPC methods.
Add a new C# class within the ‘Services’ folder of the project called ‘TodoService’.
Make sure the namespace matches the proto file.
Update the new TodoService class to inherit from the generated Todos.TodosBase base class, as follows.
public class TodoService : Todos.TodosBase
Now we need to override the GetTodos method.
The simplest way to override a method in Visual Studio is to type override within the class definition and press the spacebar key. The GetTodos method should appear automatically within a list of available methods. Use the arrow keys on your keyboard to navigate to the appropriate method, then press the Enter/Return key to create the method definition.
Note that you’ll need to add the Grpc.Core namespace in order for the ServerCallContext type to be found (click anywhere within the ServerCallContext text then press Ctrl + . followed by the Enter/Return key to fix this quickly).
Now an implementation for the RPC method needs to be provided. By default, the base class method throws an RpcException with an Unimplemented status code.
I have included a sample implementation of the method below for reference.
/// <summary>
/// Gets a collection of Todos.
/// </summary>
/// <param name="request">The Todo Request message</param>
/// <param name="context">The context for the RPC call</param>
/// <returns>A Todo Response containing a collection of available Todos</returns>
public override Task<TodoResponse> GetTodos(TodoRequest request, ServerCallContext context)
{
    var response = new TodoResponse();
    response.Todos.AddRange(_todos.Where(t => t.UserId == request.UserId));

    return Task.FromResult(response);
}
The above code creates a new TodoResponse object and adds a list of Todo items to it from an in-memory collection which is used for simulation purposes. The response is then returned to the client.
Since the generated client/stub code is set up to return the response as a Task it allows the async/await features of .NET to be leveraged to our advantage.
Another thing to note is that the protocol buffer compiler (with the gRPC plugin) helpfully generates PascalCase names e.g. UserId for any camelCase type names defined in the proto file e.g. userId. This helps to keep our C# code in line with the majority of coding standards.
Before moving on, don’t forget to map the service within the Startup class. See the code snippet below.
app.UseEndpoints(endpoints =>
{
    endpoints.MapGrpcService<GreeterService>();
    endpoints.MapGrpcService<TodoService>();

    endpoints.MapGet("/", async context =>
    {
        await context.Response.WriteAsync("Communication with gRPC endpoints must be made through a gRPC client. To learn how to create a client, visit: https://go.microsoft.com/fwlink/?linkid=2086909");
    });
});
If you fail to map the new service endpoint, you’ll encounter an Exception later whenever you try to call the service, as follows.
Grpc.Core.RpcException: 'Status(StatusCode=Unimplemented, Detail="Service is unimplemented.")'
Creating the client project
Now that the server-side of the work has been fully implemented, we can move on to creating the client.
For this walkthrough, we’ll add the client project to the same solution so that we can easily run the server and client projects together when testing.
Within the Solution Explorer right-click on the top-level Solution node, click ‘Add’, then click ‘New Project…’
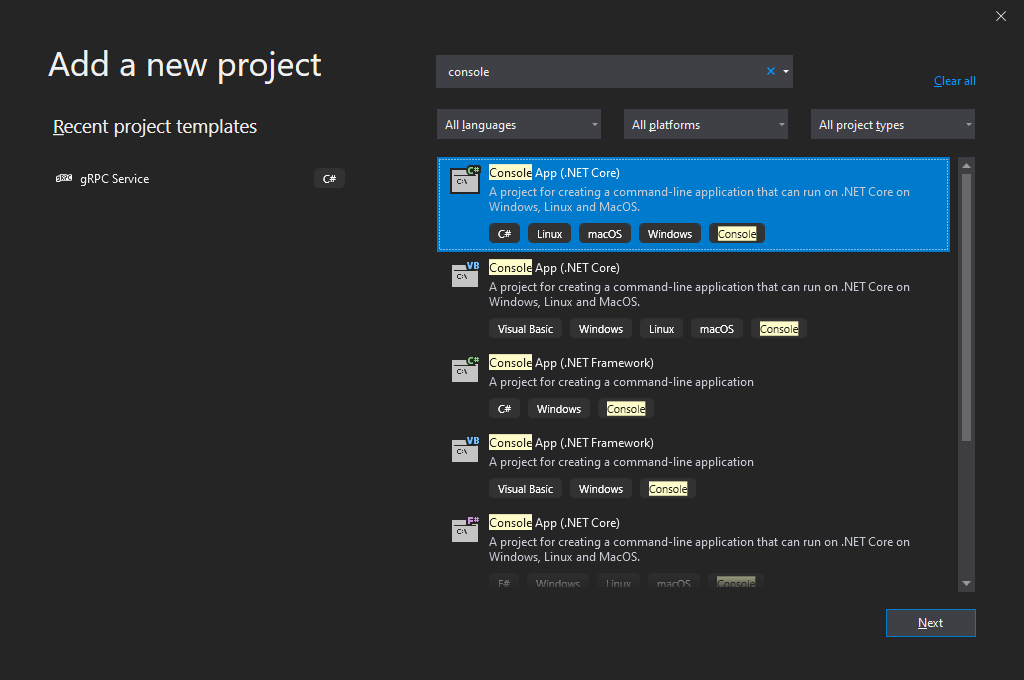
Type the word ‘console’ into the Search box and select the ‘Console App (.NET Core)’ template, then click ‘Next’.
Now give the project a suitable name.
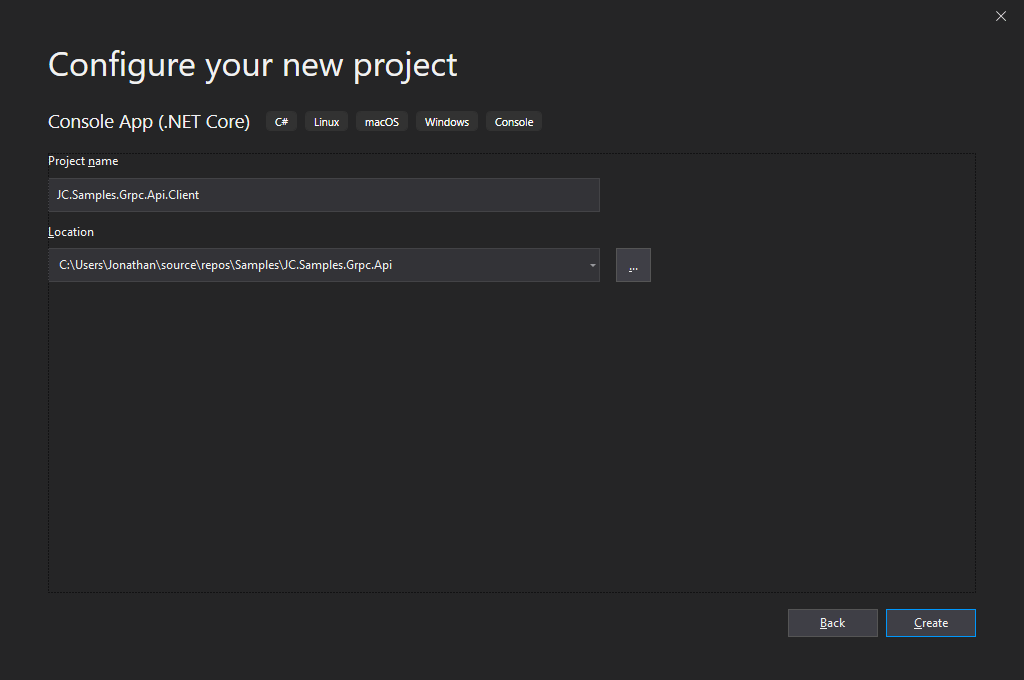
In my sample solution, I have given the client project the same name as the server project, but have added the text ‘.Client’ to the end of the name.
Now click ‘Create’.
Following the creation of the client project, we need to generate the client code to call the gRPC service endpoints.
The easiest way to do this is to add a Service Reference to the client project by following a similar set of steps as we did previously for the server project.
Again, within the Solution Explorer, right-click on the client project, click on ‘Add’, then ‘Service Reference…’
Click on the ‘Add new gRPC service reference’ link.
To the right of the ‘File’ field, click the ‘Browse…’ button.
Navigate to the ‘todos.proto’ file within the ‘Protos’ folder of the server project, open it and click ‘OK’.
The project file will now be updated with the service reference details, the necessary NuGet packages will be automatically installed, and a ‘Protos’ folder containing the ‘todos.proto’ file will appear within the project as a ‘linked’ project item, hence the little arrow symbols to the left of the folder and file.
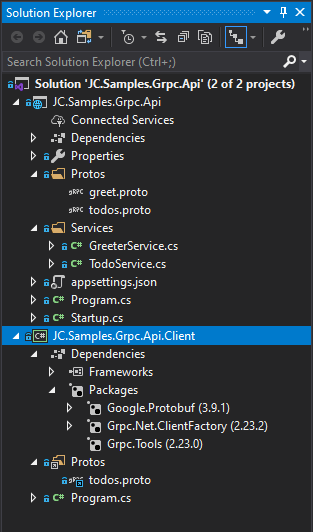
If you expand the ‘Packages’ node within the client project you will see that the following NuGet packages have been added to the project.
At this stage, we can proceed to add the gRPC client code.
Implementing the client code
First of all, update the signature of the Main method within the Program class in the client project to the following.
static async Task Main(string[] args)
Now add the following code to the Main method.
using var channel = GrpcChannel.ForAddress("https://localhost:5001");

var client   = new Todos.TodosClient(channel);
var response = await client.GetTodosAsync(new TodoRequest { UserId = 2 });

foreach (var todo in response.Todos)
{
    Console.WriteLine($"Title: {todo.Title}");
}
As you can see, the client code is minimal.
First, a channel is created for the specified address and a client object is then initialised, passing in the channel/connection.
Next, the GetTodosAsync method on the client object is called to retrieve a response from the service.
Lastly, the todo objects in the response are output to the console.
Note that a GetTodos method is also available if there is a need to call the endpoint synchronously.
If you’re not familiar with the using var syntax, it is a C# 8 feature that simplifies object disposal code. Rather than requiring brackets and braces to wrap the code where the using keyword is used, the channel object will be automatically disposed at the end of the enclosing scope i.e. at the end of the method.
Testing client to service communication
The most convenient way to test calls to the gRPC service is to configure the solution to run the server and client together when debugging commences.
To do this, within the Solution Explorer, right-click on the Solution and click on ‘Properties’.
Select the ‘Multiple startup projects:’ radio option.
Update the Action combo-box to ‘Start’ for both the server and client projects and make sure that the server project is above the client project in terms of ordering.
Click ‘OK’ to apply the changes.
Now press the ‘Start’ button or the F5 key to run the solution projects.
Two separate console windows should open; one for the server and one for the client.
The server output should look similar to the following.
info: Microsoft.Hosting.Lifetime[0]
      Now listening on: https://localhost:5001
info: Microsoft.Hosting.Lifetime[0]
      Application started. Press Ctrl+C to shut down.
info: Microsoft.Hosting.Lifetime[0]
      Hosting environment: Development
info: Microsoft.Hosting.Lifetime[0]
      Content root path: C:\Users\Jonathan\source\repos\Samples\jc-samples-grpc-api\JC.Samples.Grpc.Api
info: Microsoft.AspNetCore.Hosting.Diagnostics[1]
      Request starting HTTP/2 POST https://localhost:5001/todos.Todos/GetTodos application/grpc
info: Microsoft.AspNetCore.Routing.EndpointMiddleware[0]
      Executing endpoint 'gRPC - /todos.Todos/GetTodos'
info: Microsoft.AspNetCore.Routing.EndpointMiddleware[1]
      Executed endpoint 'gRPC - /todos.Todos/GetTodos'
info: Microsoft.AspNetCore.Hosting.Diagnostics[2]
      Request finished in 118.1325ms 200 application/grpc
The client output for my sample project is as follows.
Getting todos...

Found 2 todos
=============

Title: Leave out the trash
Title: Clean room

Press any key to exit
Note that you’ll need to copy the full client code from my sample project on GitHub to get the same output in the client console window.
If you encounter an error at runtime, double-check that you have mapped the service in the Startup file.
Clearing up
.NET Core has great support for consuming gRPC services and ASP.NET Core is an excellent platform for building services.
Having said that, it’s important to note that thanks to the open nature of the gRPC protocol and the wide range of languages that already have support for it, you can mix and match technologies as needed. For example, you can write a gRPC service using Java and consume it using .NET Core, Kotlin, or any other language which the protocol buffer compiler supports generating gRPC client/stub code for.
I hope you find lots of great use cases for gRPC in your future projects.
Comments