
I’ve always had a keen interest in Linux-based operating systems and especially since .NET Core is a cross-platform framework there’s more reason than ever to sharpen up your Linux skills if you enjoy programming with C# or another .NET language.
In this article, I walk through the process of installing and testing out the Windows Subsystem for Linux (WSL).
I’ll explain what WSL is and provide a brief insight into how you can begin to get familiar with Linux (Ubuntu in particular) and where to go next.
Note: If you are revisiting this page following the reboot which is required as part of the installation process, click here to proceed to Part 2 of the installation.
What is WSL?
WSL is a Windows Feature that facilitates running Linux programs natively on Windows.
Nope, we’re not talking about a virtual machine, this is real Linux running on Windows. A stable version of the Linux kernel is now shipped with Windows!
WSL was developed by Microsoft alongside Canonical, the creators of ‘Ubuntu’. There are many different flavours of Linux available, referred to as ‘distributions’ (or ‘distros’ for short) one of which is named Ubuntu.
After initially only supporting Ubuntu, WSL has been expanded to include support for other popular Linux distros such as Debian and Kali.
Being able to run Linux directly on your Windows machine is a great feature for developers, allowing apps that are optimised for Linux to be executed and tested directly without having to deploy code to a separate physical or virtual machine.
Before we move on, although it is possible to run a wide variety of Linux programs with WSL, it is important to note that the technology is mainly geared up for running command-line tools.
With all that said, let’s go ahead and get WSL installed so we can begin exploring it.
Installation (Part 1)
Note that you’ll need to update Windows to Windows 10 version 16237.0 or higher in order to follow along and only 64-bit editions of Windows are supported.
First of all, you need to install the WSL Windows Feature.
The quickest way to do this is to open the ‘Run’ dialog (WIN + R) then type the following command.
optionalfeatures
Now press the Enter/Return key.
This will load the ‘Windows Features’ window.
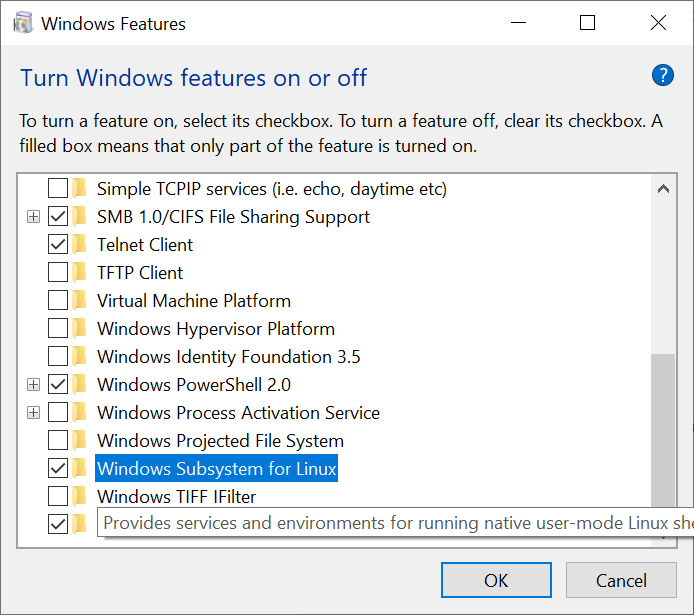
Scroll to the bottom of the features list, tick the ‘Windows Subsystem for Linux’ checkbox and then click OK.
After the feature has been installed you will be informed that Windows needs to reboot your PC to finish installing the requested changes.
At this point, I advise that you bookmark this blog post, then go ahead and reboot your PC. You can use the hyperlink I’ve provided at the beginning of the post to quickly access the instructions for Part 2 of the installation.
Installation (Part 2)
After your machine has booted up again, type ‘store’ into the Windows Start menu search box. The first search result should be the Microsoft Store, click on it to open the Microsoft Store app.
Use the ‘Search’ box within the Microsoft Store app to find Ubuntu.
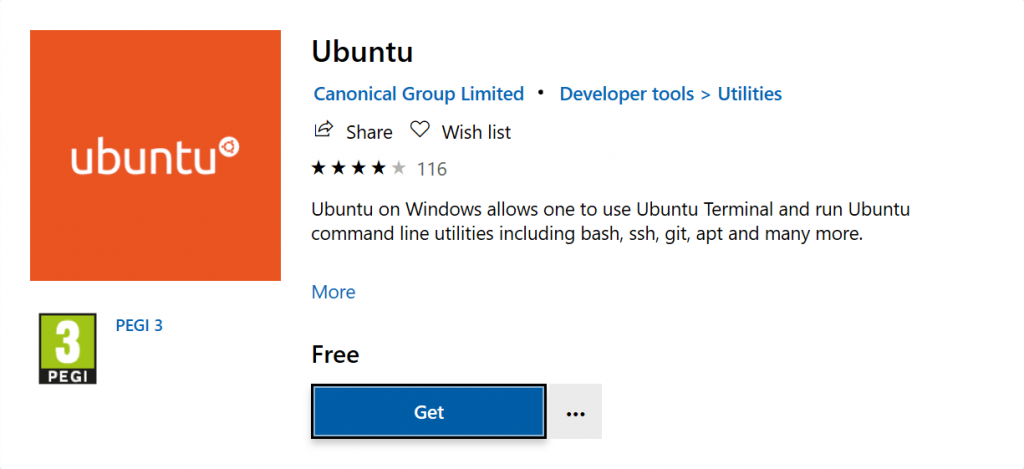
Press the ‘Get’ button to install the app.
After the app installation has completed you can either press the ‘Launch’ button or search for ‘ubuntu’ using the Windows Start menu search box. The first search result should direct you to the newly installed Ubuntu app.
Note that you can also use the ‘Run’ dialog to launch the Ubuntu app at any time using the same ‘ubuntu’ text.
Whenever the Ubuntu app is launched for the first time you will see the following message on the console host.
Installing, this may take a few minutes...

Once the installation completes you will be greeted with the following message.
Please create a default UNIX user account. The username does not need to match your Windows username.
For more information visit: https://aka.ms/wslusers
Enter new UNIX username:
Enter a username for the default account that your Ubuntu session will use e.g. ‘jonathan’.
Note that much like filenames, Linux account usernames are case-sensitive across most distros, so it’s normally easier to enter your username in lower-case.
After entering a username you will then be asked to enter a password followed by confirmation of the password. Enter your desired password and this will complete the Ubuntu setup.
I have included the remaining text which you should expect to see in the console below.
Enter new UNIX password:
Retype new UNIX password:
passwd: password updated successfully
Installation successful!
To run a command as administrator (user "root"), use "sudo <command>".
See "man sudo_root" for details.
Great! You’re now ready to try out some Linux commands.
Test Drive
If you happen to have Windows Terminal installed you’ll see that a Ubuntu profile has been created for you automatically – handy!
Check out my Windows Terminal blog post for instructions on how to get started with Microsoft’s new open-source terminal.
Regardless of which terminal you are using, type the text pwd within your Ubuntu session, then press the Enter/Return key. This will display your present working directory which should be similar to the following if you are using the Windows Terminal (otherwise it will most likely be a Linux directory such as /home/jonathan).
/mnt/c/Users/Jonathan
As you can see, WSL automatically mounts your system drives in mnt and sets your user folder as the current working directory. This allows you to easily access your Windows files from the Linux command-line.
Note, to access your ‘C:’ drive, for example, at any time just type the following command.
cd /mnt/c
If you are already familiar with Linux then you’ll know what to do from this point. If not, to get started, try running a few of the following commands and inspect the output.
lsb_release -a

df

ps

cal

ifconfig

history

clear
Running the lsb_release -a command on my terminal yields the following output.
No LSB modules are available.
Distributor ID: Ubuntu
Description:    Ubuntu 18.04.2 LTS
Release:        18.04
Codename:       bionic
To get a description for any of the commands you’ve just run you can type whatis followed by the name of the command.
e.g.
whatis lsb_release
This will display the following.
print distribution-specific information
Closing
So there you have it, real Linux on Windows!
WSL is hugely powerful and provides developers with the tools needed to create and test apps for Linux.
I recommend that you explore further with the command-line as the next step, trying out the most used Ubuntu commands.
I also suggest that you check out the Windows Terminal if you haven’t already as it offers a great experience in conjunction with WSL.
Comments