

In my previous post, I introduced Azure Functions and walked through the process of creating and debugging your first C# function using Visual Studio.
This time, I’m covering the topic of deployment and how functions can be published to Azure.
After reading this article, you’ll understand how to publish an Azure Function to Azure using Visual Studio and you’ll gain an insight into how function authorisation works so that you can successfully call protected cloud functions.
Publishing to Azure
While there are several ways to get your function code deployed to Azure, in this article I will be covering one of the simplest, which is publishing directly from Visual Studio using its built-in tooling.
I recommend using the latest version of Visual Studio, which at the time of writing is Visual Studio 2022.
Visual Studio provides a seamless integration with Azure that allows you to create publish profiles visually and get direct feedback regarding the success or failure of a deployment.
In the future, you could look into other options such as Azure Pipelines or GitHub Actions These platforms allow you to implement continuous delivery or continuous deployment depending on your requirements.
Note that parts of this article assume you are following on from my previous article where I walked through the creation of your first Azure Function. However, if you haven’t read the previous article you can still follow along and ignore any specific references to the Azure Functions project that was created previously.
Creating a publish profile
To publish an Azure Function we need to create a publish profile. Visual Studio provides a convenient interface for doing this which allows us to create any required Azure resources at the same time.
To create a publish profile within Visual Studio, you first need to right-click on the project that contains your Azure Functions and then select the ‘Publish…’ option from the context menu. This will open the Publish dialog shown below.
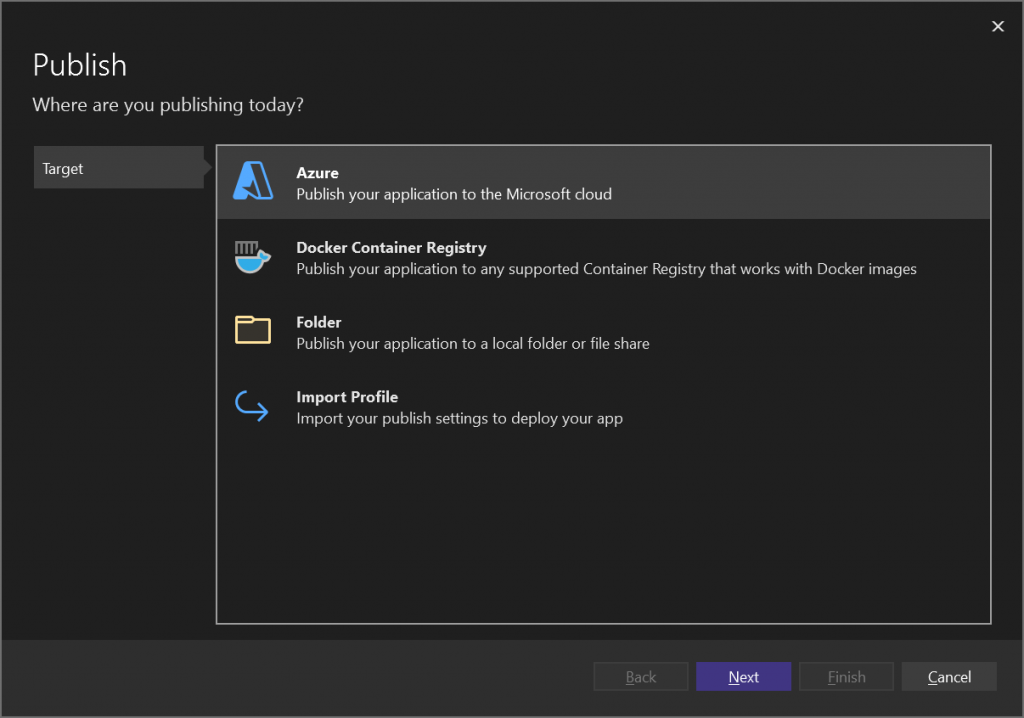
Make sure the ‘Azure’ item is selected and press the ‘Next’ button to continue.
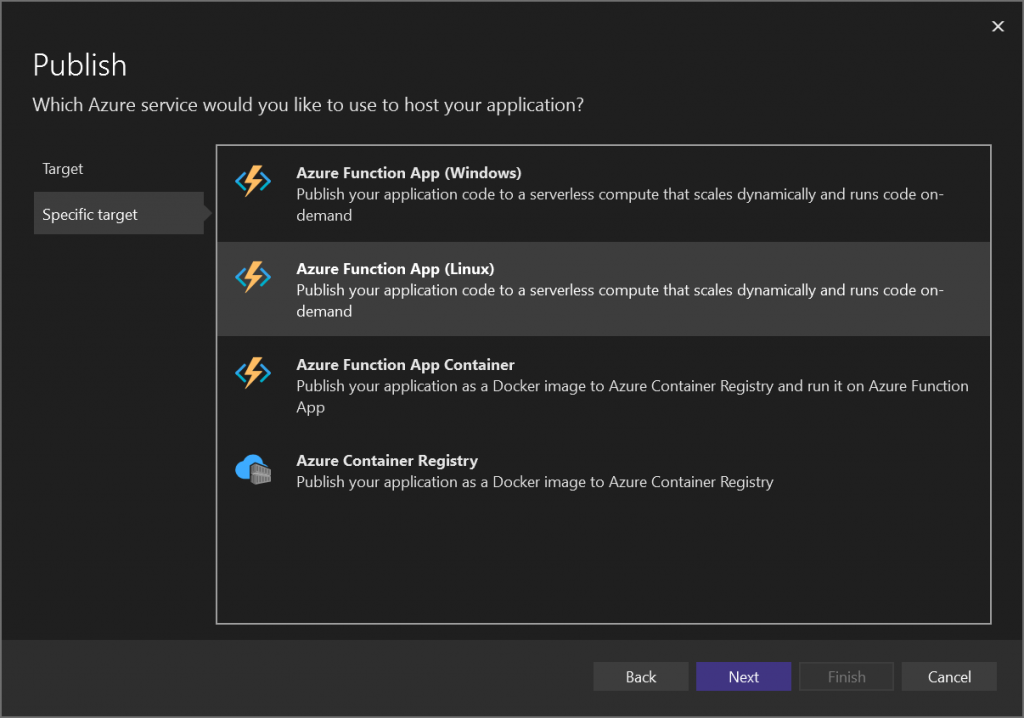
On the Specific target page, select the ‘Azure Function App (Linux)’ item and press the ‘Next’ button to continue to the next page.
Note that you may also select the ‘Azure Function App (Windows)’ item instead if you prefer. I find that Linux-based Azure resources tend to give you more ‘bang for your buck’ compared to Windows-based resources, due to savings on things like Windows licensing fees. However, there are other trade-offs to consider such as the fact that it isn’t possible to place Linux-based resources within the same resource group as Windows-based resources and vice-versa.
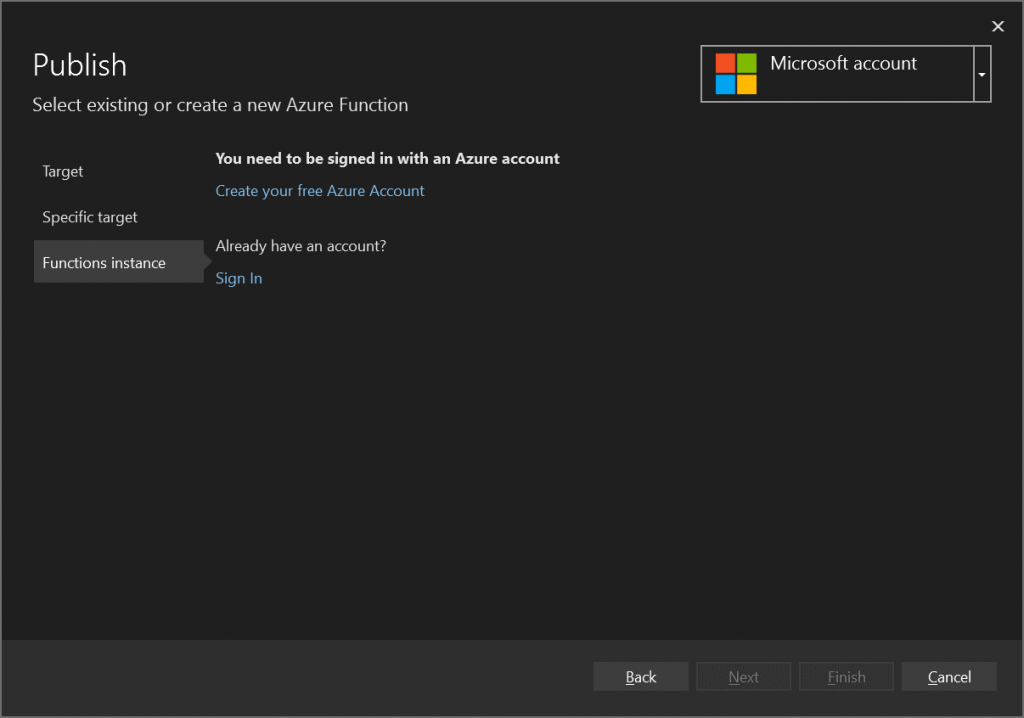
Once you get to the Functions instance page, you’ll need to sign into your Azure account before proceeding any further.
You can either select an existing account from the combo box at the top-right of the page or select the ‘Sign in’ link. If credentials need to be entered, a dialog like the one shown below will appear.
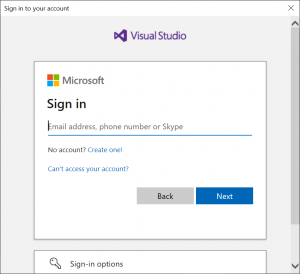
Enter your email and password and then press the ‘Sign in’ button to complete the authentication process.
After you have successfully signed into your Azure account, you will be returned to the Functions instance page where any existing Function Apps that you can publish to will be displayed.
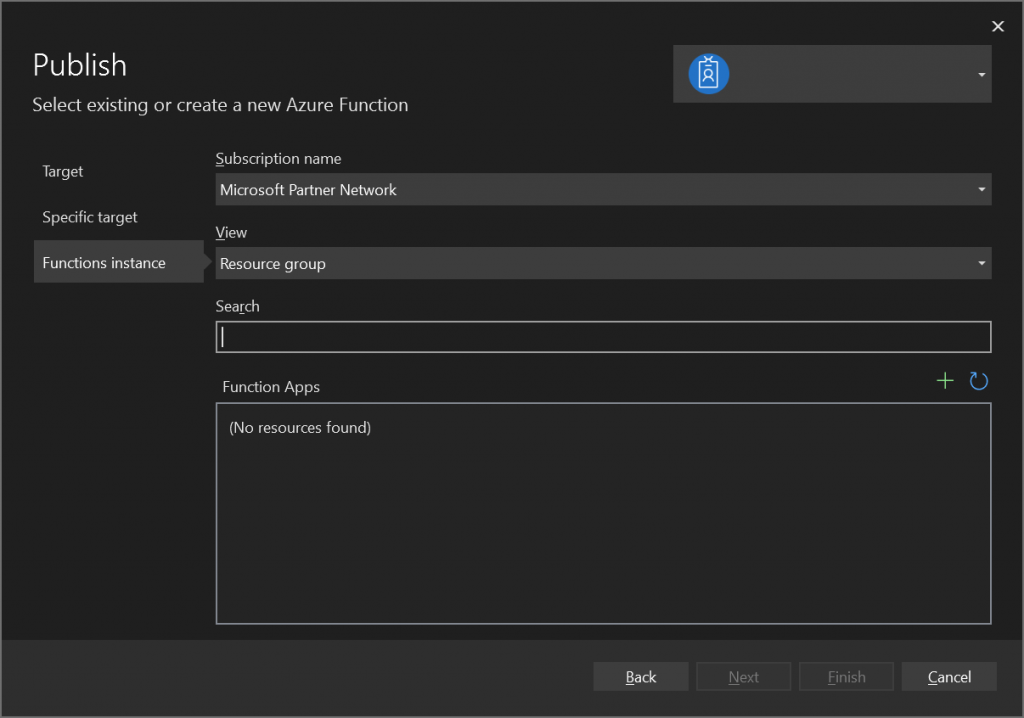
If you don’t have any existing Function Apps within your Azure subscription, the text ‘(No resources found)’ will appear under the Function Apps heading.
Press the green plus (+) icon to launch the Function App dialog, this will allow you to create the required resources.

On the Function App dialog, enter a sensible Name for the app resource, I’ve chosen the name ‘func-todos’.
Note that for all Azure resources, I recommend adopting a consistent naming convention that uses the official Azure abbreviation recommendations. For a nice visual representation of these abbreviations, check out the Azure Periodic Table of Resource Naming Convention Shorthands by Justin O’Connor.
Make sure you have selected the correct Subscription name and Resource group. If you don’t have an existing resource group, press the ‘New…’ link, then enter a suitable name and press the ‘OK’ button.
For the Plan Type, I recommend selecting the ‘Consumption’ plan as it offers a true serverless platform and features a very generous monthly free grant of one million requests.
Select a Location that is geographically near to you and select an Azure Storage account. If you don’t have an existing storage account, press the ‘New…’ link, then specify an Account name, appropriate Location, and Account type. An account type of Standard – Locally Redundant Storage will be sufficient for testing purposes. Press the ‘OK’ button when you are ready.
After specifying all of the Function App form fields, press the ‘Create’ button and the new resources will be deployed. You will see progress messages such as the following displayed.
Creating: App Service…
After all of the resources have been deployed, the new Function App will become available for selection back on the Publish dialog under the Function Apps heading.
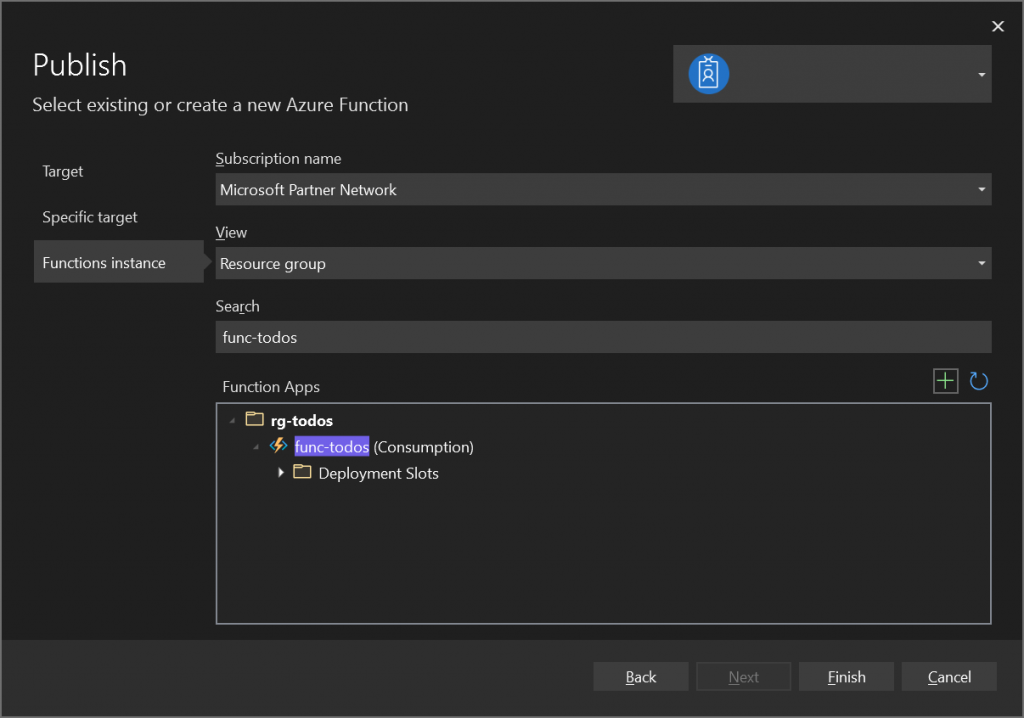
Expand the resource group and select the Function App instance, then press the ‘Finish’ button to complete the setup of the publish profile. The text ‘Waiting…’ will be displayed briefly and then the Publish dialog will close.
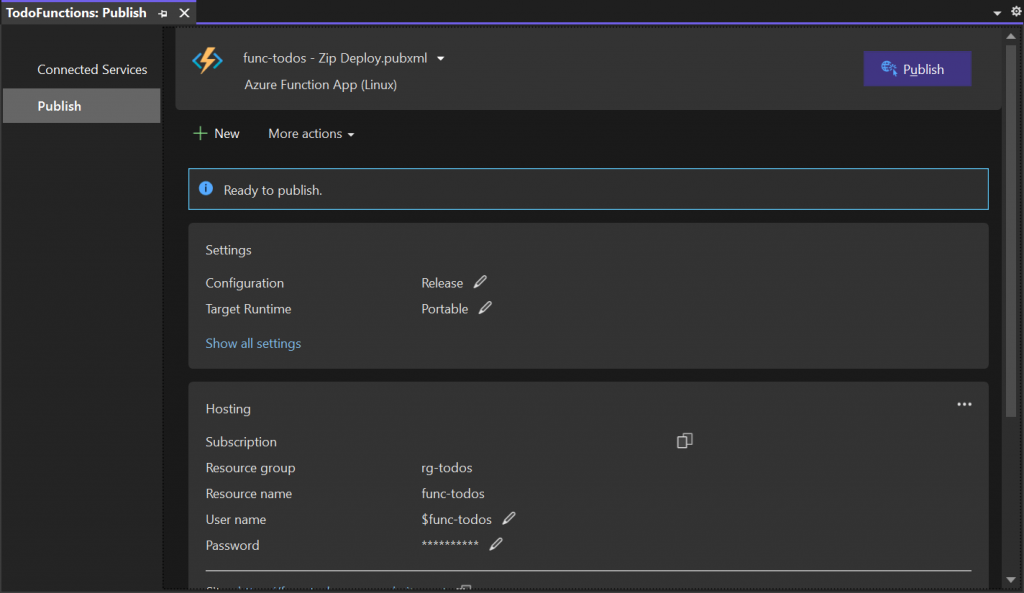
After the Publish dialog has closed, the Publish tab within Visual Studio will be visible, displaying the details of the newly created publish profile.
If you’re interested, you can find the underlying XML definition of the publish profile within a newly created ‘PublishProfiles’ folder under the ‘Properties’ node of your project. There should be a file in this folder that is named something like the following.
func-todos – Zip Deploy.pubxml
The above filename indicates that the publish method is Zip Deploy, meaning that the Function App code will be compressed into a zip file before being uploaded to Azure for extraction.
Now that the publish profile has been created, you are ready to deploy your function.
Function deployment
Let’s get our function deployed!
Function App
Within the Visual Studio Publish tab, you will find a link that will take you to the Function App resource that your function(s) will use when they are deployed (you may need to scroll down to see this).
The Site link will be similar to the following.
https://func-todos.azurewebsites.net
If you click on your version of the link, you will be taken to a web page that looks similar to the screenshot below.
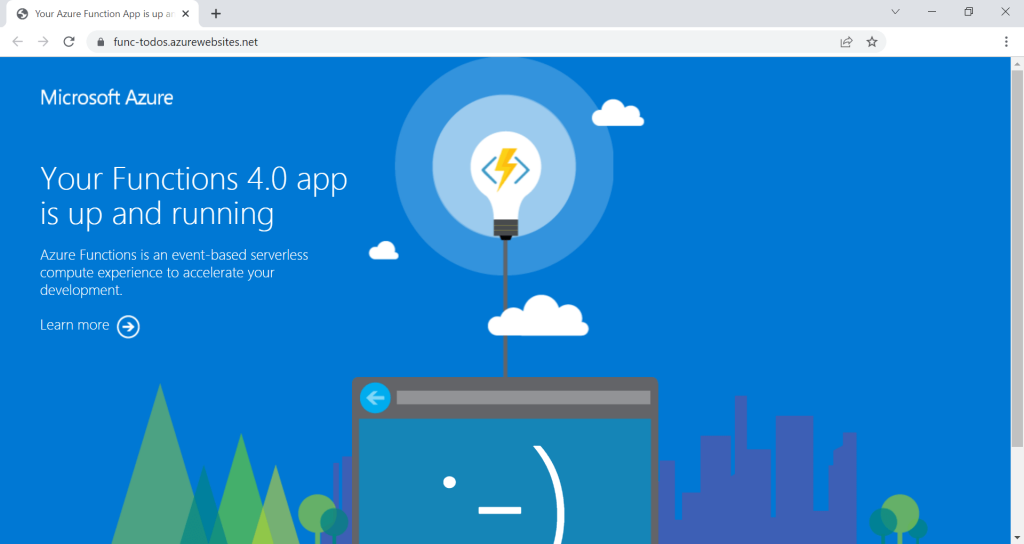
This proves that the Function App is up and running, but we haven’t published our function code yet, we’ll do that next.
Publish
To publish your function(s), press the ‘Publish’ button within the Visual Studio Publish tab.
Publishing can take a few minutes the first time you deploy your functions to Azure. During the publishing process, you should see progress messages such as the following.
Publishing to Azure Function App (Linux)…
After publishing has been completed, you will receive a message similar to this.
Publish succeeded on 03/11/2022 at 12:39
Note it’s also possible you will encounter an error when you try to publish, such as the following.
Publish has encountered an error. We were unable to determine the cause of the error. Check the output log for more details.
If this error occurs (or another similar error) I recommend that you update Visual Studio to the latest version and try again.
After a successful publish operation, an ‘Open site’ link should appear within the Visual Studio Publish tab. This will take you to the same web page we opened in the previous sub-section. However, now our function code is in the cloud and it is ready to be executed.
Calling the function
Now that the function code has been published to Azure, let’s see if we can invoke our function.
Try copying the following Function App URL into your web browser, replacing the emboldened text according to the name of your Function App.
https://func-todos.azurewebsites.net/api/todos?userId=2
The function call will fail with a HTTP ERROR 401 (unauthorised) status. This is because we previously specified function-level authorisation for the ‘GetTodos’ function and we haven’t specified a Function Key.
Function Key authorisation
So where do we get the Function Key that is required to authorise the request?
Within the Azure Portal, navigate to your Function App resource. Under the ‘Functions’ heading on the left-hand panel select the ‘Functions’ option and then select the ‘GetTodos’ item from the list of functions.
Near the top of the view, press the ‘Get Function Url’ button and then press the ‘Copy to clipboard’ icon, as shown in the screenshot below.
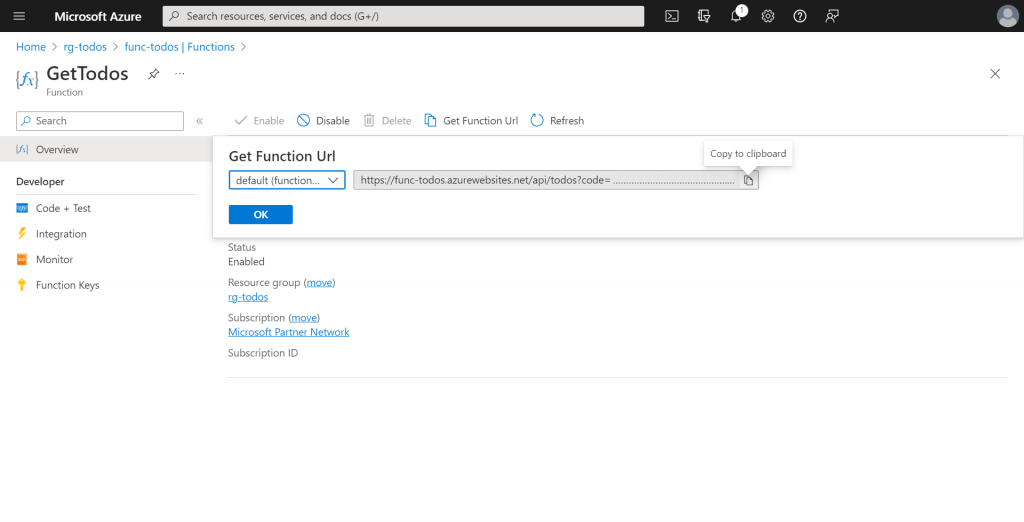
Now, paste the copied URL into your web browser address bar. The URL should look similar to the one shown below with the emboldened text differing from your version.
https://func-todos.azurewebsites.net/api/todos?userId=2&code=YOUR_API_KEY
The function call should succeed this time and return a JSON response as follows.
[{"id":2,"userId":2,"title":"Leave out the trash","completed":false},{"id":3,"userId":2,"title":"Clean room","completed":false}]
I recommend creating another Function Key within the Azure Portal interface to get comfortable with key management. To manage keys, you can press the ‘Function Keys’ option on the left-hand panel within Azure when your function interface is shown (see the screenshot further above). From here, you can add, renew, and delete keys.
It’s also possible within the main Function App resource interface to manage ‘host’ keys which can be used to access all functions within the same Function App, instead of requiring a separate Function Key for each function.
Other authorisation options
Bear in mind that API keys are not the only way to secure your Azure Functions. There are plenty of other options such as Azure Active Directory (AAD), Azure API Management (APIM), or an IdentityServer instance that you manage.
I recommend assessing the pros and cons of each authorisation approach to determine which one is the most appropriate for your scenario. You’ll want to ensure that the approach you choose fits in well with your overall system architecture, whether that be simple or complex.
Summary
In this article, I demonstrated how you can publish your first Azure Function to Azure using Visual Studio.
I started by walking through how to use the Visual Studio tooling to create a publish profile. During this process, we were also able to create the Azure resources that are required as part of the supporting Function App infrastructure.
After creating the publish profile, I showed you how to complete the publish operation and test the deployed function.
Finally, I included some information regarding Function Keys and noted some of the alternative authorisation methods that are available for Azure Functions.
Comments