When storing or transmitting sensitive digital data, it is vital to take adequate measures to protect it against unintended disclosure that could harm your privacy or the privacy of others.
Common examples of sensitive data include client files that need to be stored offline for a limited time, and documents containing customer details that need to be transmitted via email or another messaging platform. For scenarios like these where files and folders are involved, one of the approaches you can take is to move the data into a password-protected, encrypted zip archive. Modern encryption methods such as AES-256 provide strong protection, particularly when a suitably complex password is used.
The Windows operating system doesn’t provide the ability to create encrypted zip archives via the default File Explorer. However, programs such as 7-Zip and the cross-platform PeaZip, provide this functionality for free.
While the standard zip archive format supports encryption, including very strong encryption using algorithms such as AES-256, it does not allow folders and file names to be encrypted. Depending on the circumstance, this can be a big limitation when seeking to guard sensitive data from prying eyes, since folder names and file names potentially give away a lot of information to a malicious user.
In this article, I will walk through how you can use 7-Zip to encrypt everything, including folder names and file names, using the 7z archive format, providing the maximum possible protection for your data.
Walkthrough
Okay, let’s get started!
First of all, imagine that we have a folder named ‘Backup’ containing a ‘Clients’ sub-folder.
The ‘Clients’ folder contains further sub-folders relating to each of our clients; Acme, Bright Designs, Dynamic Services etc.
We don’t want to risk our list of clients and their data being exposed, so we have decided to create a password-protected zip archive to encrypt the data.
Note that this walkthrough section assumes that you are using a modern Windows operating system, such as Windows 10 or Windows 11.
Zip format
Let’s start with the zip format, which will encrypt file contents, but not the folder names and file names. Afterwards, we’ll look at how the 7z format can be used instead to further enhance our security posture.
To create a compressed folder using the zip format, we will use 7-Zip.
If you don’t have the 7-Zip program installed on your system already, you can download it from the official 7-Zip website. Usually, the ’64-bit x64′ .exe version will be the one you are looking for.
Add to Archive
After installing 7-Zip, right-click on the previously mentioned ‘Backup’ folder (or whatever the folder you want to encrypt is called) and select the Z-Zip –> Add to archive… option from the context menu. This will launch the 7-Zip ‘Add to Archive’ window shown in the screenshot below.
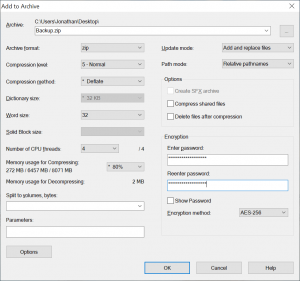
Within the Add to Archive window, enter matching passwords into the ‘Enter password’ and ‘Reenter password’ fields within the ‘Encryption’ section at the bottom-right.
You can leave all other settings at their default values.
After pressing the ‘OK’ button, the zip archive will be created and the Z-Zip window will disappear.
Archive contents
After the compression process has been completed, navigate to the archive location and double-click the zip file to open it within File Explorer. You will see that even though this is an encrypted zip file, it is still possible to view the directories and files that are contained within the archive, as shown in the screenshot below.
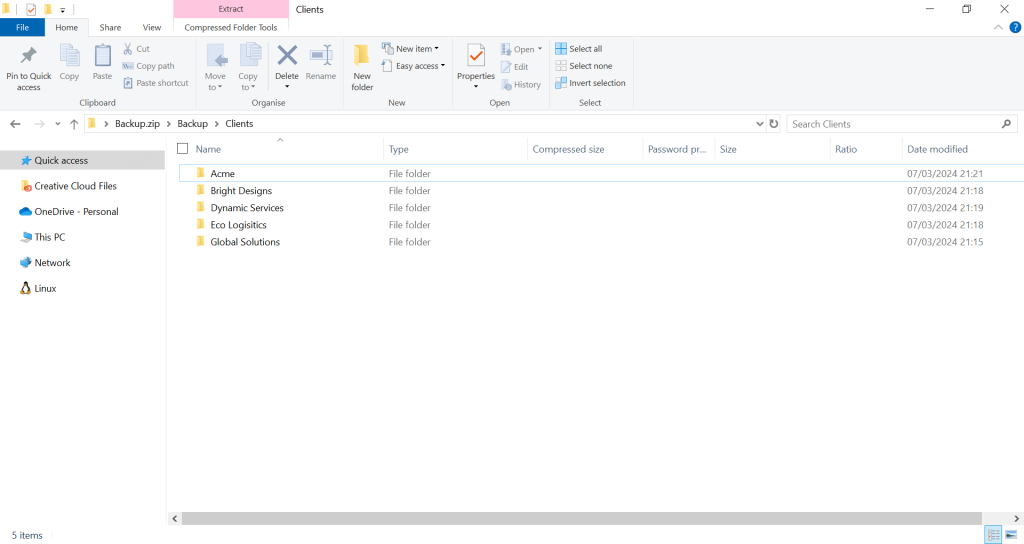
For our particular situation, this is less than ideal, as anyone with access to this zip file can now see a list of our clients without needing to enter the decryption password!
If we open the ‘Acme’ folder we can see that file names are also visible, as shown below.
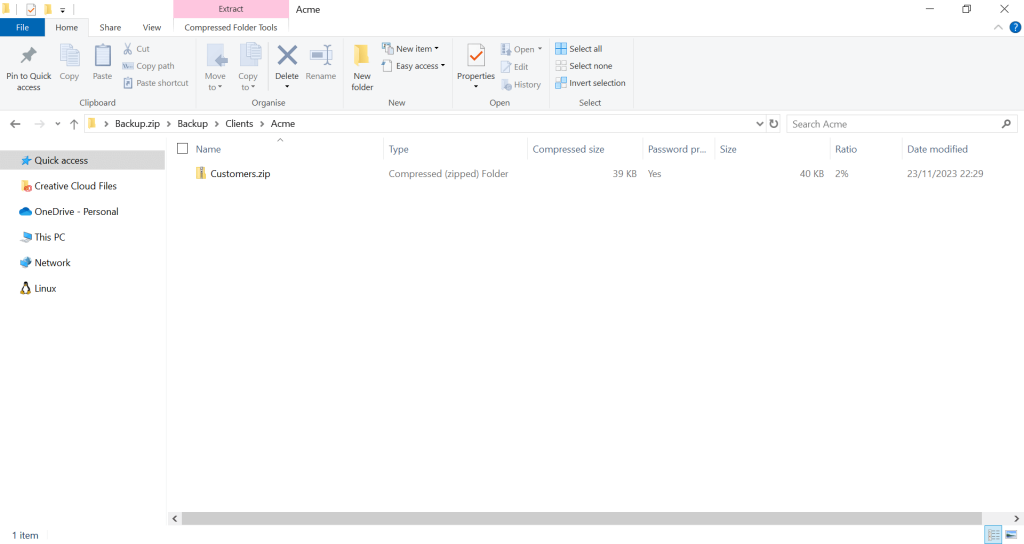
Although we can see the folder names and file names, if we try to open any file that is contained within the zip archive, we will get an Error/Warning message as follows.
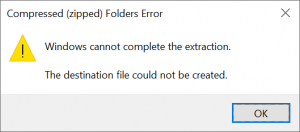
At least we know that the contents of the files cannot be viewed, but this may be of little consolation if we have deemed the list of our client names to be sensitive!
Indeed, if we open the ‘Backup.zip’ file that was created in Notepad++ we can see that the directory paths such as ‘Backup/Clients/Acme/Customers.zip’ are stored in plain text.
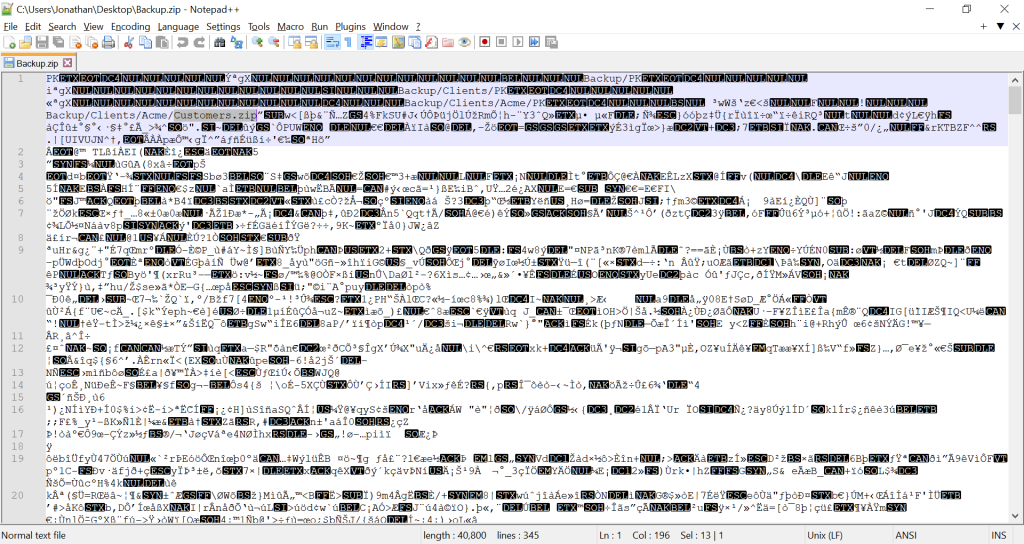
Given this file format, it would be trivial for a list of all directory paths to be scraped from the file.
So, what can be done to fix this?
That’s where the 7z format comes into its own.
7z format
The 7z format provides a distinct advantage over the standard zip format with its support for encrypting file names.
The process for creating a compressed folder in the 7z format using 7-Zip is very similar to what has already been covered for the standard zip format. However, let’s go through the process together in the following subsections for clarity.
Add to Archive
As per the instructions for the standard zip format, right-click on the ‘Backup’ folder and select the Z-Zip –> Add to archive… option from the context menu. This will launch the 7-Zip ‘Add to Archive’ window shown below.
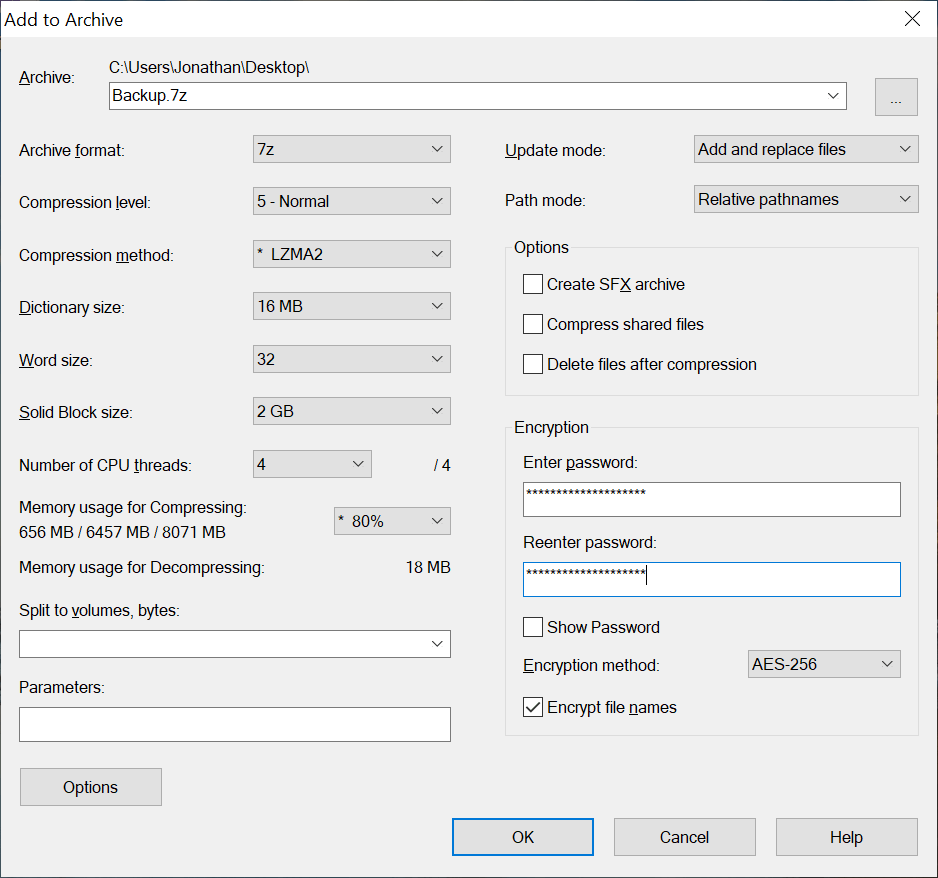
This time, change the ‘Archive format’ drop-down near the top-left of the window to ‘7z’.
After doing this, you will notice at the bottom-right of the window a new option named ‘Encrypt file names’. Be sure to tick this option after filling in the password fields, then press the ‘OK’ button to proceed.
Archive contents
If you navigate to the location of the ‘Backup.7z’ file that has just been created and try to open it, you will be presented with an ‘Enter password’ dialog provided by 7-Zip as shown in the screenshot below.
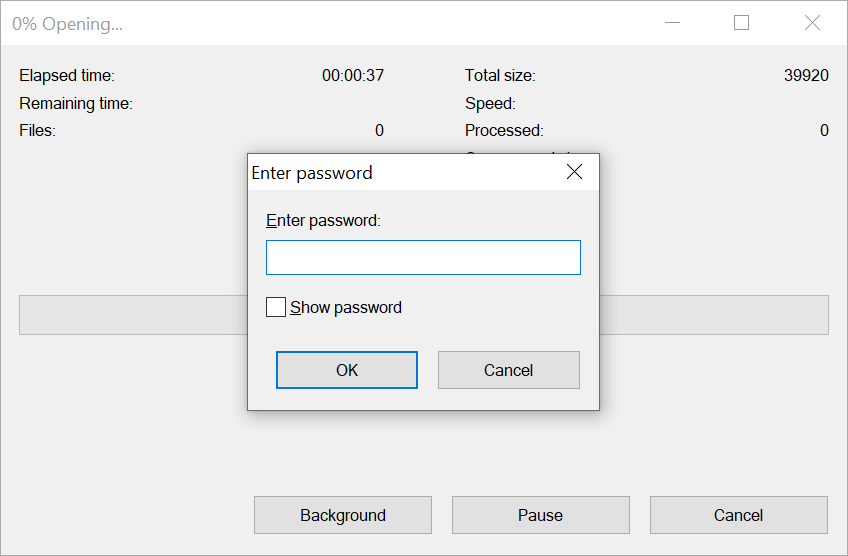
This is quite different from the standard zip format which allows you to open and browse the contents of the zip archive regardless of whether or not it is encrypted.
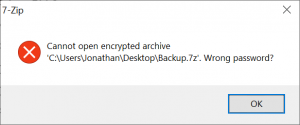
If an incorrect password is entered into the password dialog, an error message will be displayed, as shown below.
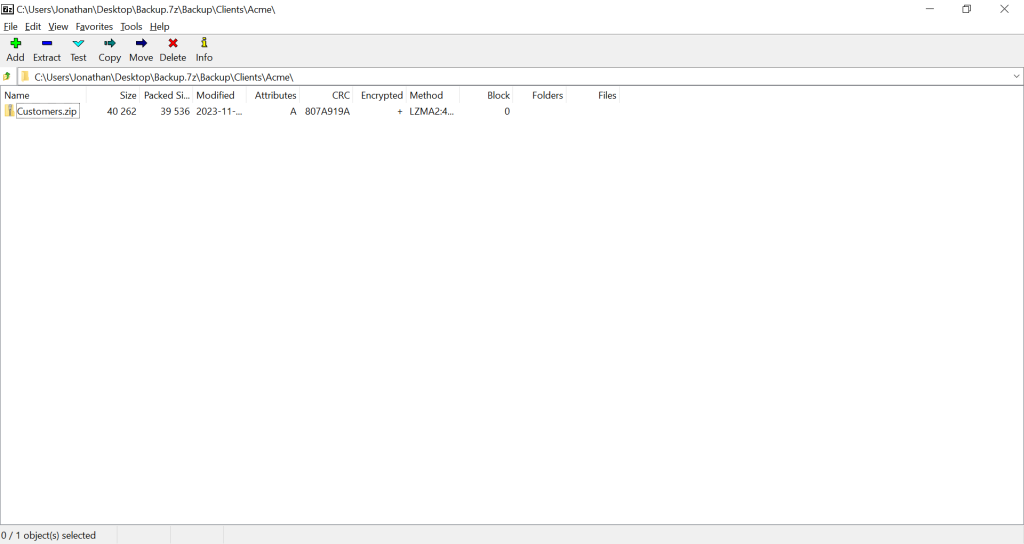
On the other hand, if the correct password is entered, the zip archive will be decrypted and the contents can then be browsed using the 7-Zip file manager (or PeaZip!).
To confirm that we are now in a better security position compared to using the zip format, if we open the ‘Backup.7z’ file using Notepad++ we can now see that everything is encrypted.
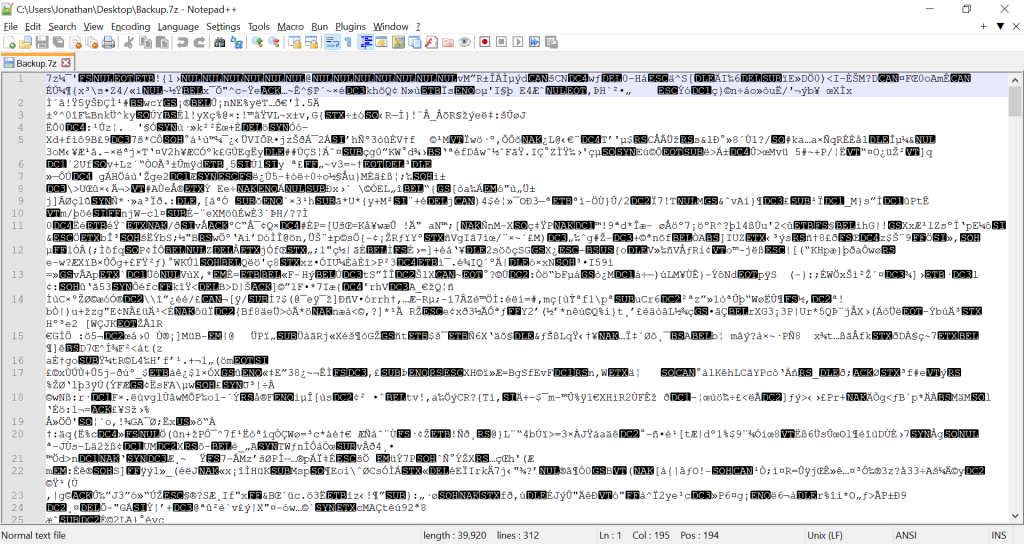
If you scan the contents of the 7z file you will not be able to find directory paths or any other data stored in plain text. This helps close the loop from a security perspective when the folder names and file names are considered sensitive.
The level of security offered by the 7z archive format with AES-256 and file name encryption is reassuring, helping to safeguard sensitive data in every form, whether that be in the folder/file names or the file contents themselves.
Summary
In this article, I have provided a walkthrough of how to use the 7-Zip program to encrypt sensitive data, crucially demonstrating the ability to encrypt file names when using the 7z format.
I started by showing you how to create an encrypted archive using the standard zip format and then proceeded to demonstrate how to do the same using the 7z format with file name encryption enabled. By inspecting the file contents in a text editor, I was able to prove that the file names were encrypted when using the 7z format.
In closing, I wanted to mention that although I’ve been using 7-Zip for quite some time as my preferred file archiver, there’s no doubt that PeaZip boasts an impressive set of features. It supports a larger range of compressed folder types compared to 7-Zip and includes additional security features, such as two-factor authentication (password + keyfile) protection for encrypted files. So, while 7-Zip is a great program, I would also encourage you to check out PeaZip and explore all of the features and tools it offers to see if there’s something additional that you could benefit from.


Comments